
Outside of your normal Payroll Processing schedule, there are times when you may need to issue a manual check. In these cases, the check is still recorded in payroll and processed with your next check date, but is typically hand-written on your own check stock to provide the employee at the time of issuance.
Why Issue A Manual Check?
There are many reasons you may need to issue a manual check to an employee. Some of the most common situations we see where manual checks are needed include:
- An employee lost their check.
- For an employee's final check upon termination as an employee at your organization.
- If an employee was underpaid.
- If an employee was not paid and payroll was already submitted.
- For entering amounts for recordkeeping purposes (this is particularly common for Single-Owner S Corporations). In these cases, a manual check does not necessarily need to be written.
Step-By-Step Instructions
To create your Manual Check, begin by launching the Process Payroll module from the home page of your HRIS portal.
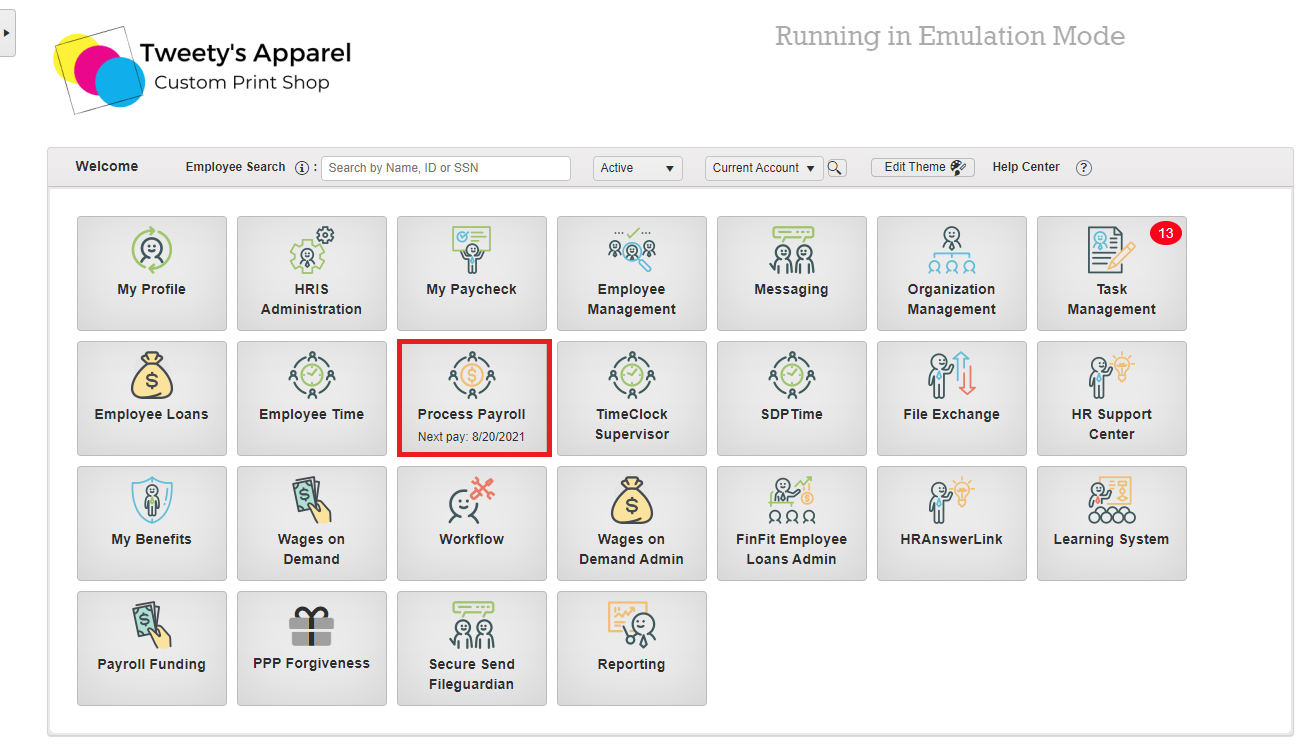
Manual checks can be calculated either before or after starting payroll. Whenever a manual check is saved or saved and printed, it is automatically stored in a VM (Void/Manual) Batch that can be processed with your next (or current) payroll so the employee year-to-date file is updated with the appropriate wage and tax amounts.
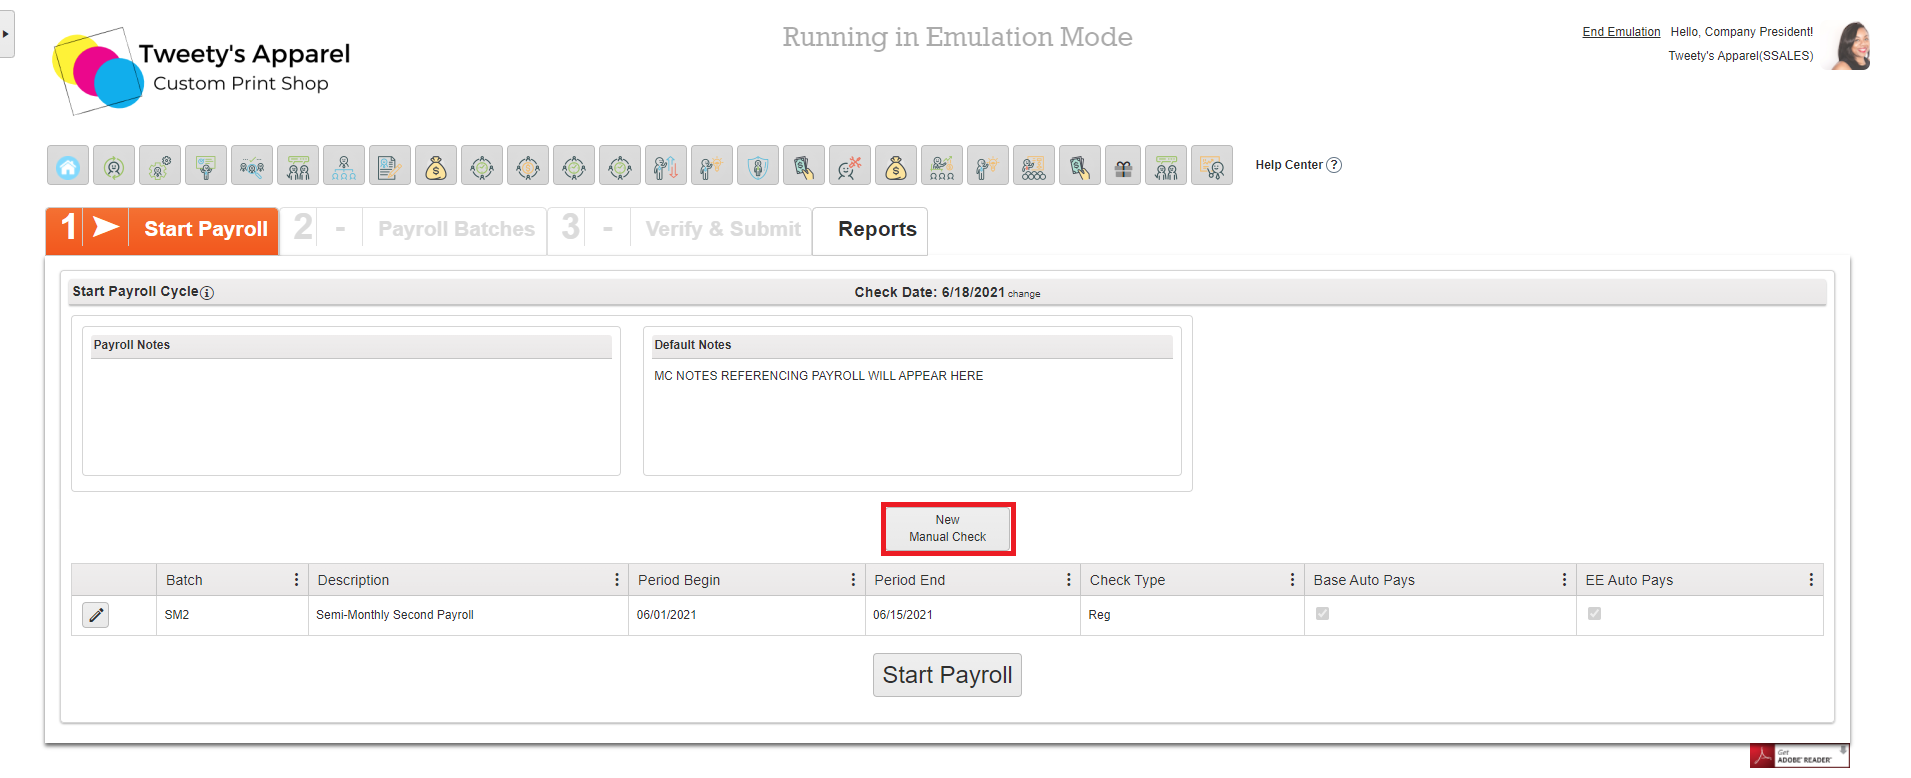
If you have not already started payroll, you can click New Manual Check from the Start Payroll screen here:
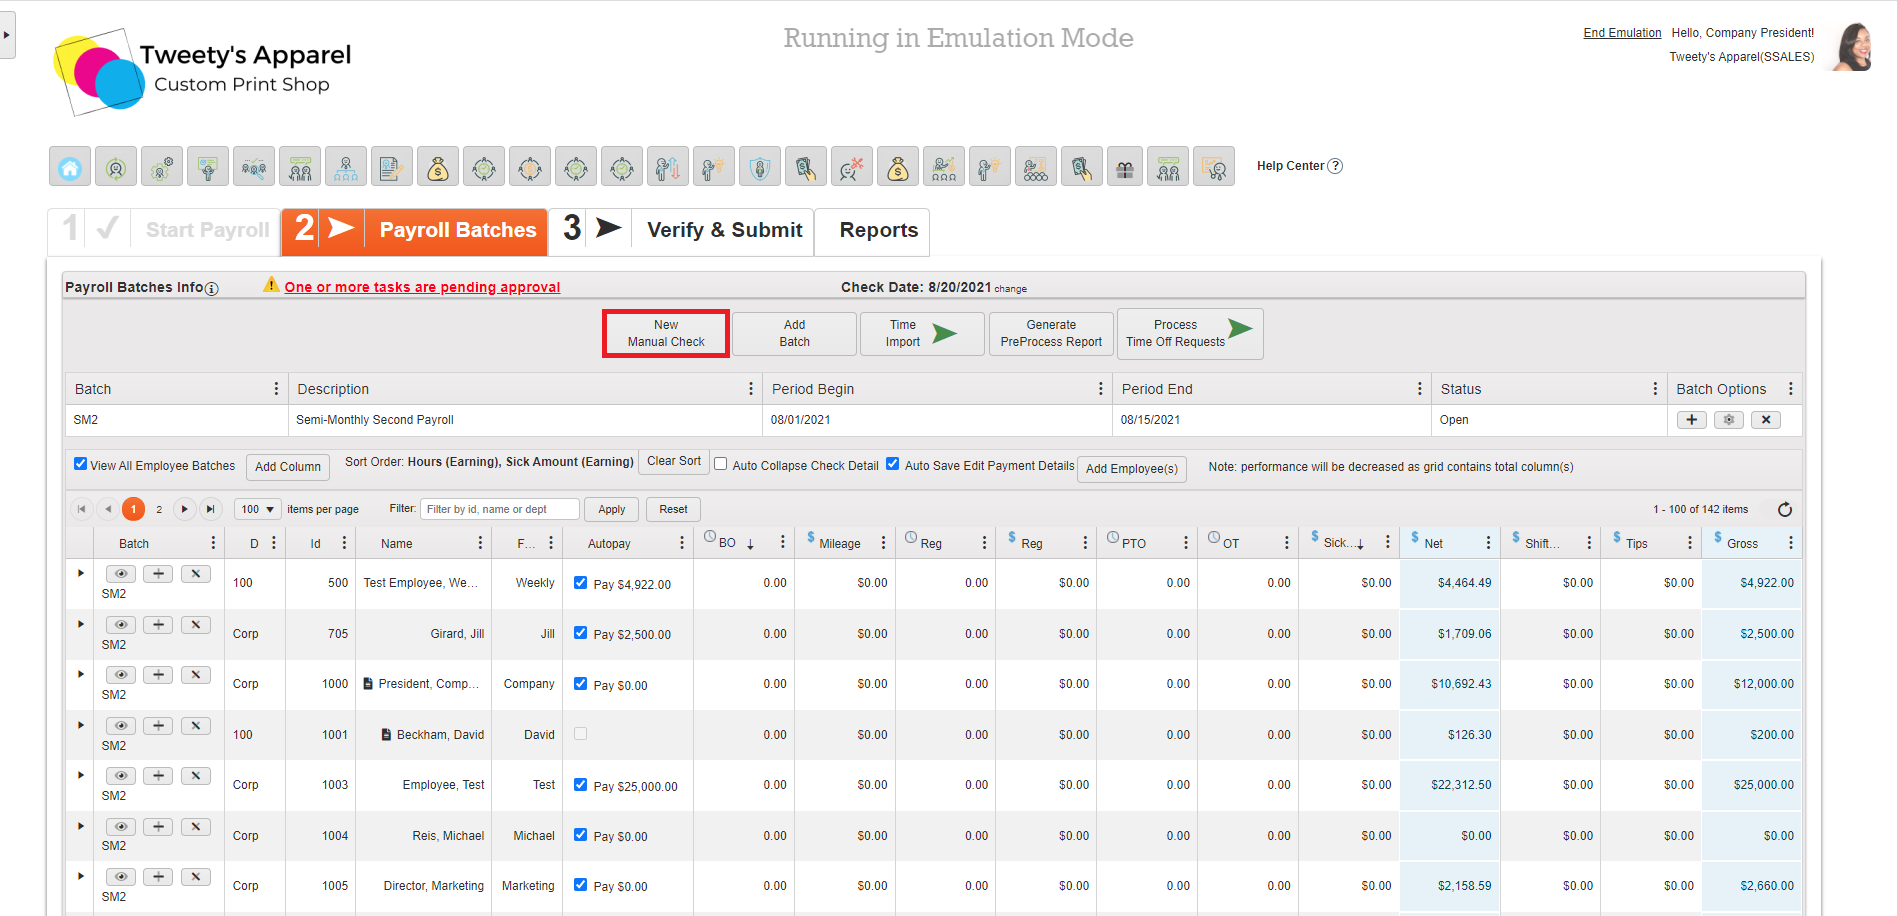
If you have already started payroll, you can click the New Manual Check button from the Payroll Batches screen here:
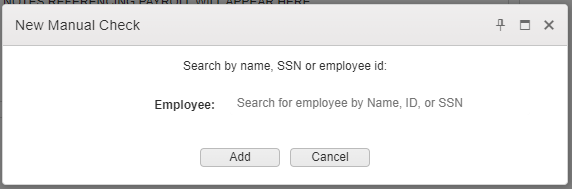
This will prompt you to select the employee you would like to issue the manual check to by searching for them by Name, ID, or SSN. Once you have selected the appropriate employee, click Add.
This will open a dialogue box with the information for the Manual Check.
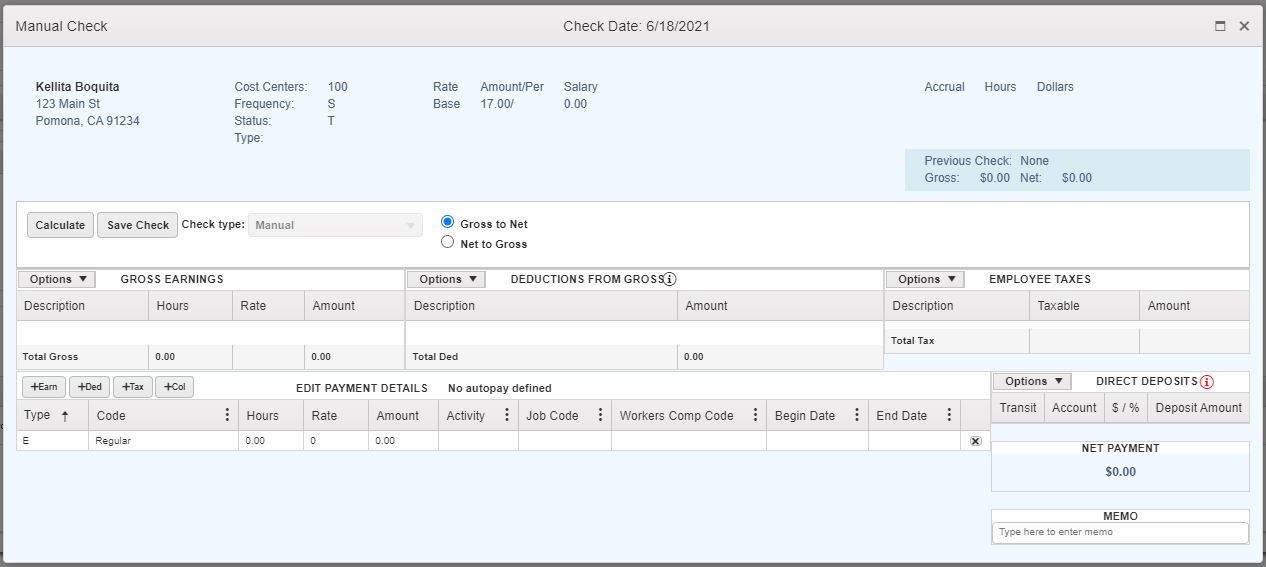
The Check Date at the top will reflect your next payroll processing check date when the manual check will be recorded in the system. This is not necessarily the date you will be writing on the check, as clients typically write on the check the current date.
In the Edit Payment Details section of pay grid, enter the employee's payment information. If you would like to use an Earning, Deduction, or Tax (DET) code that is not already listed, you can do so by pressing the +Earn, +Ded, or +Tax buttons.
If you would like to remove an Earning, Deduction, or Tax code, you can do so by clicking the X to the far right of the DET code listing.
Finally, if you need to add a Column to your pay grid that is not already visible, you can do so by clicking the +Col button. If needed, you can also remove columns from your pay grid by clicking the three dots next to the column header and clicking Remove.
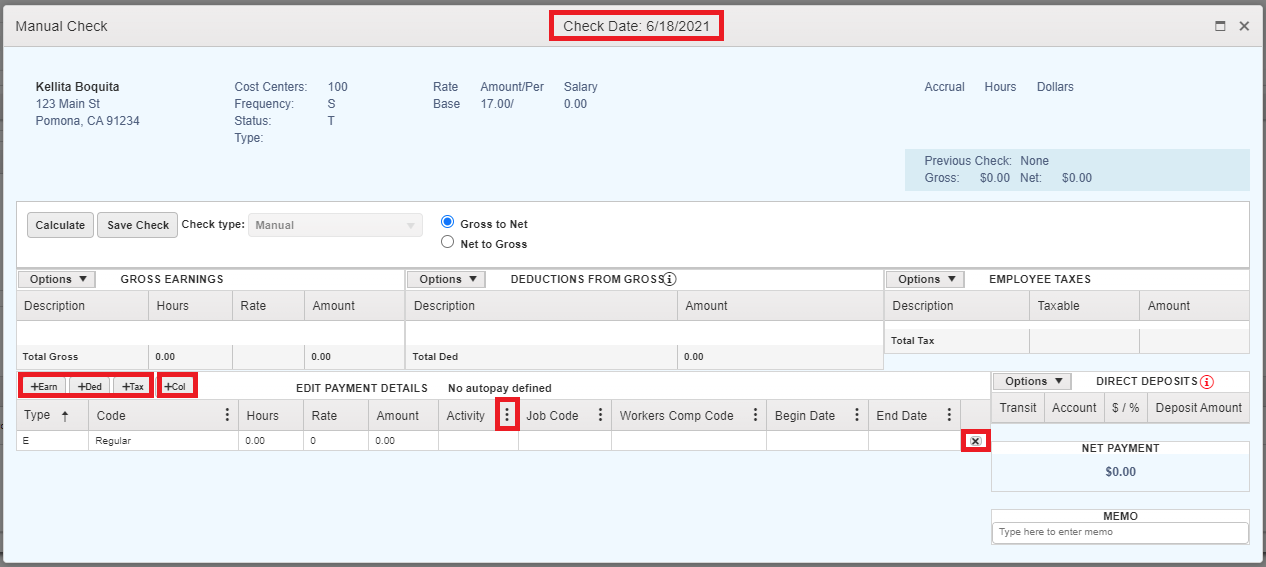
Additionally, you can click on a pre-listed DET code line item to reveal a hidden drop-down menu you can use to change the earning, deduction, or tax code.
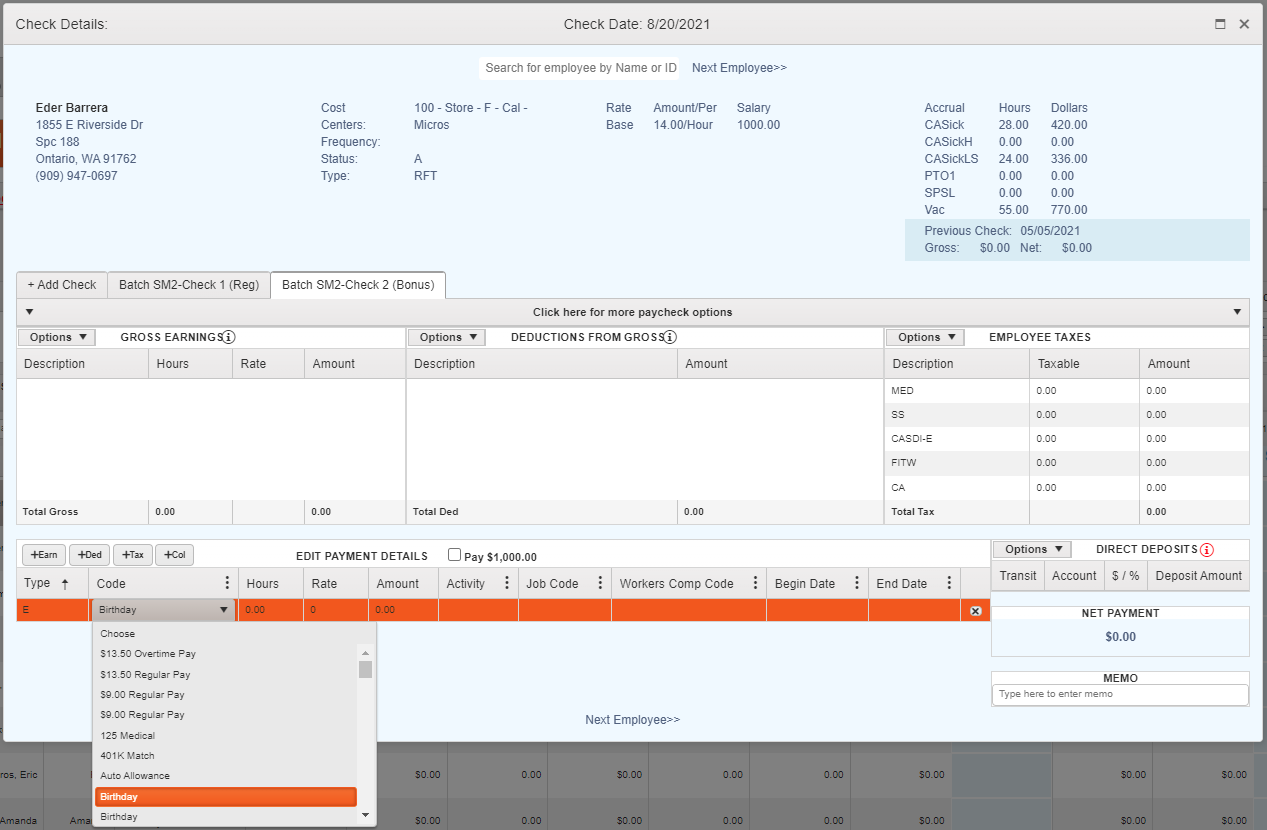
There are also block options available under the Options drop-down menus in each section (Gross Earnings, Deductions From Gross, Employee Taxes, Direct Deposit) if you need to override any system defaults.
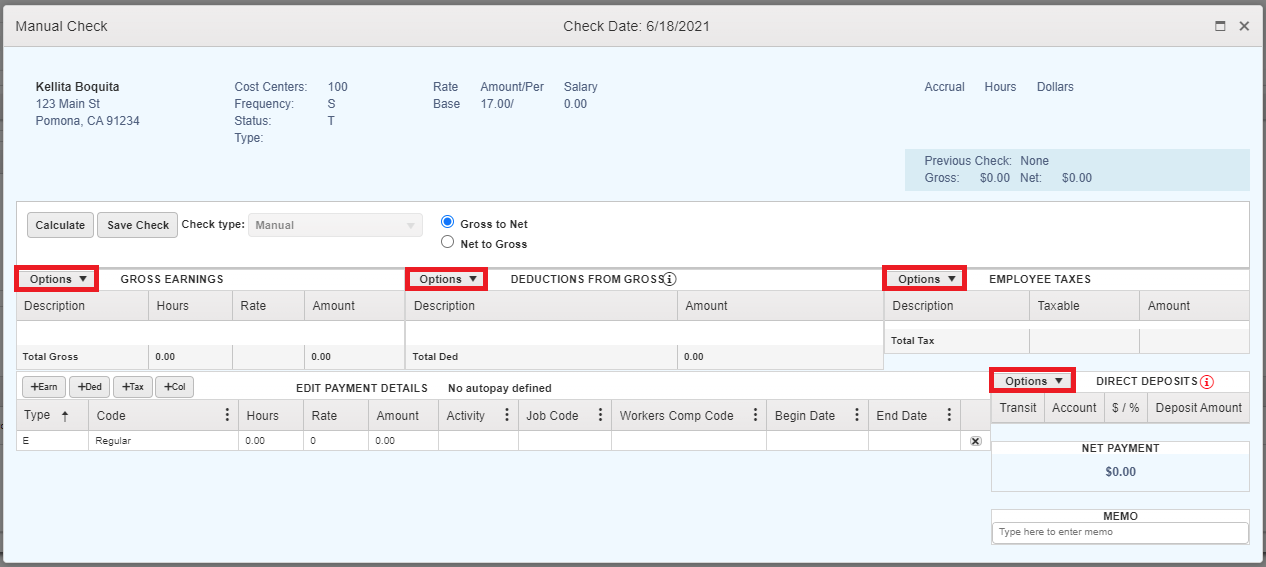
Lastly, in addition to entering an employee's pay in the Edit Payment Details, you can also select Net to Gross if your goal is to pay an employee a specific Net Amount. (For example, this is common with employee bonuses.)
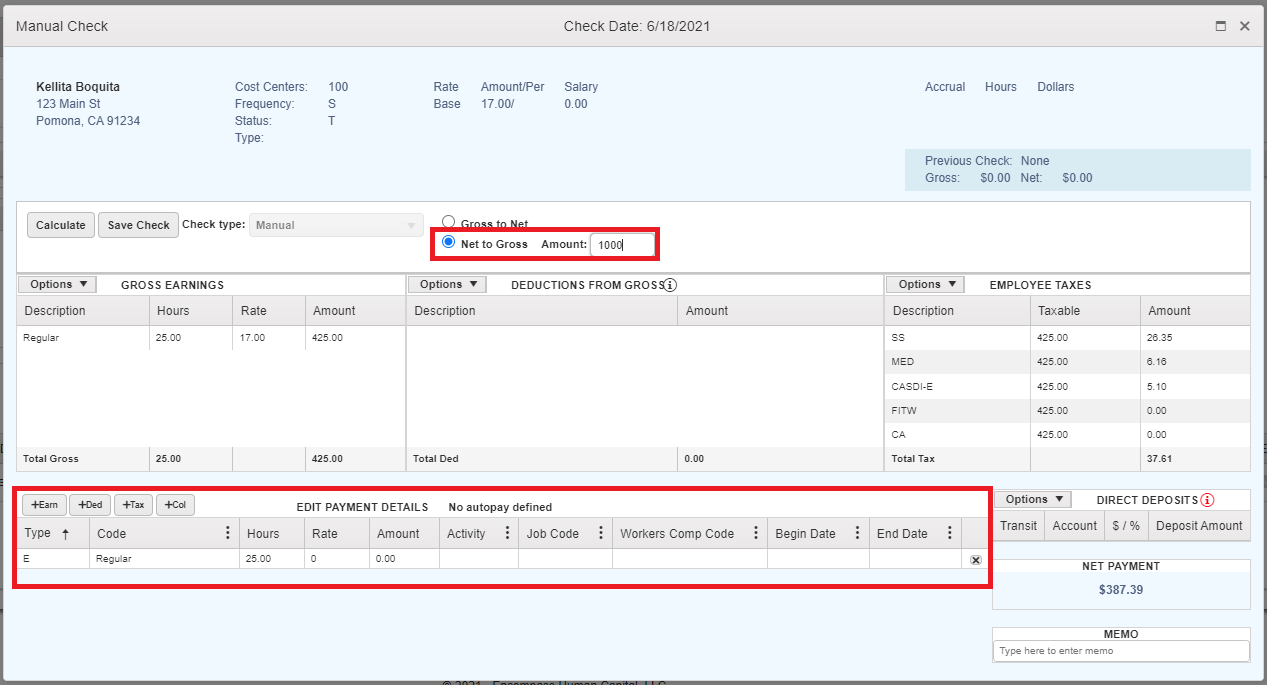
Once you have entered all of the payment details for your manual check, click Calculate to view the calculated check.
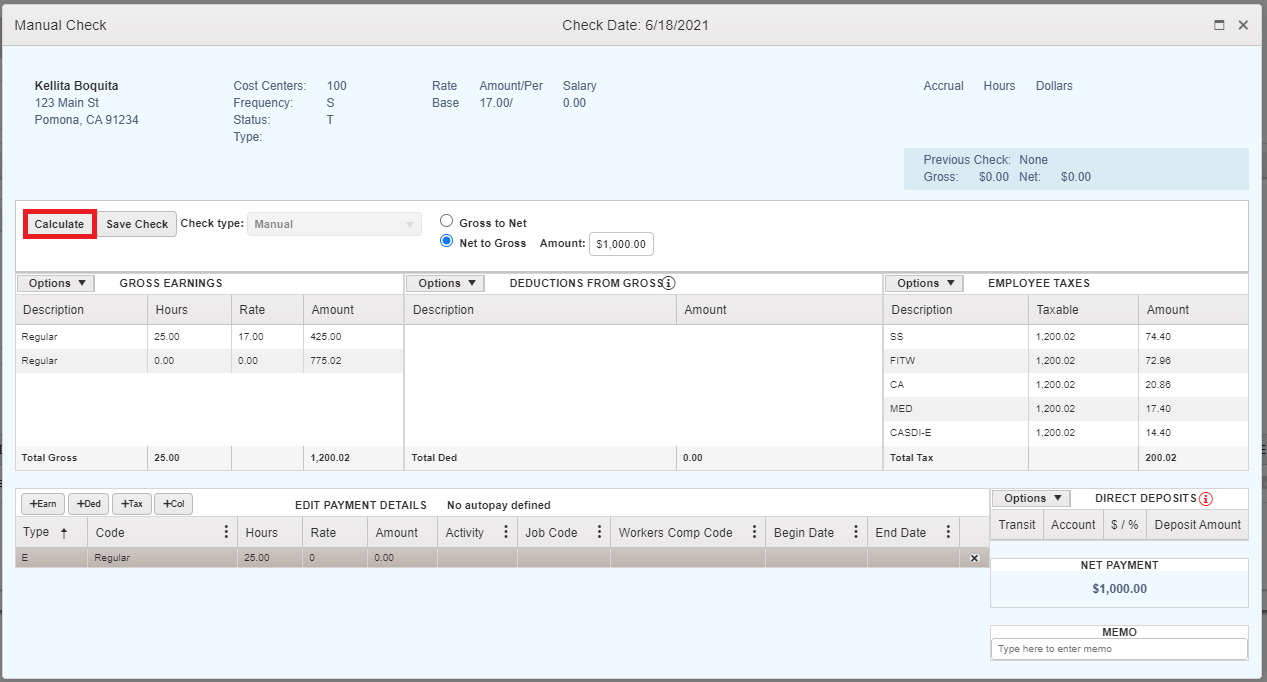
If everything looks good, press Save Check to save a record of the check.
Top Tip: Do not forget this step or your check will not be saved and included in the next payroll process! This will cause your employee year-to-date wages to be incorrect!
From here, select the Bank Account that you would like funds to be taken out of to cover the check, and enter the Check Number (this should correspond to the check stock that you will be issuing the Manual Check on).
Top Tip: If a check number is not assigned, it is assumed a check was not written and a live check will be created when the next payroll processes. Enter 9999 if the actual check number cannot be obtained to avoid a live check being created.
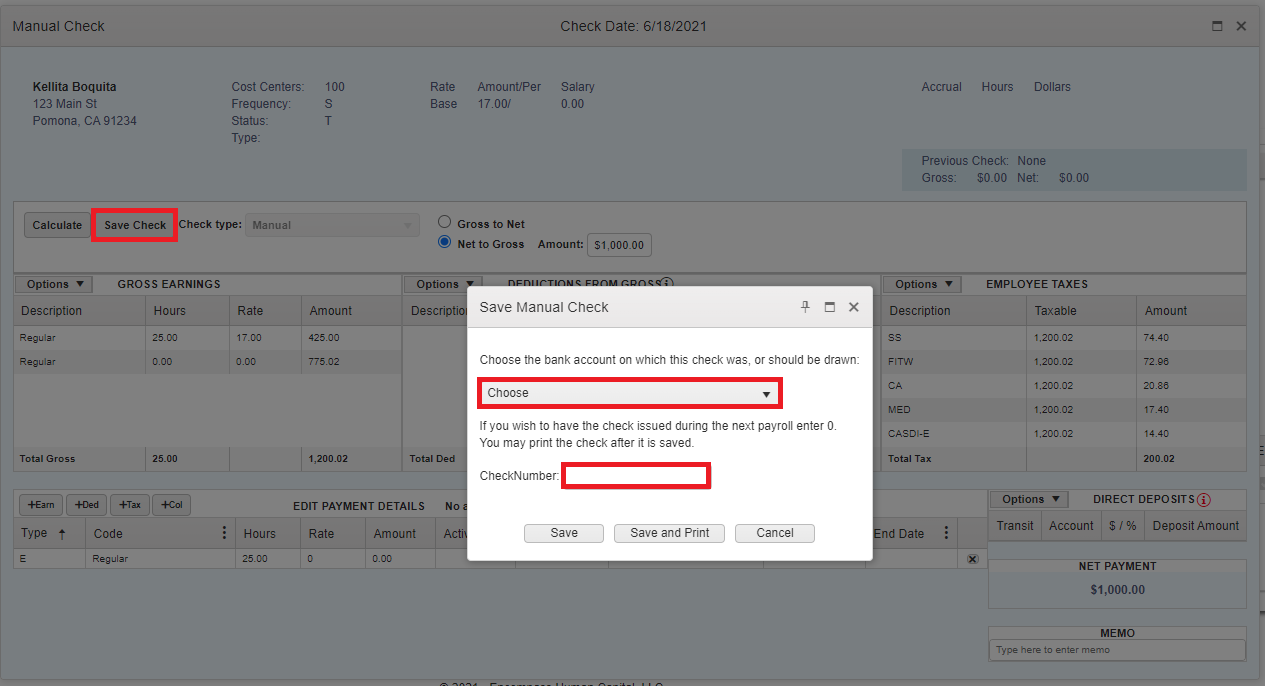
Finally, click Save and Print to record the check in your next payroll processed and download a copy of the check stub for the employee.
If you do not need a copy of the check stub, you can press Save to record the check without printing a stub.
After saving your Manual Check, it will now appear in a VM Voids/Manuals Batch that includes your Manual Check.
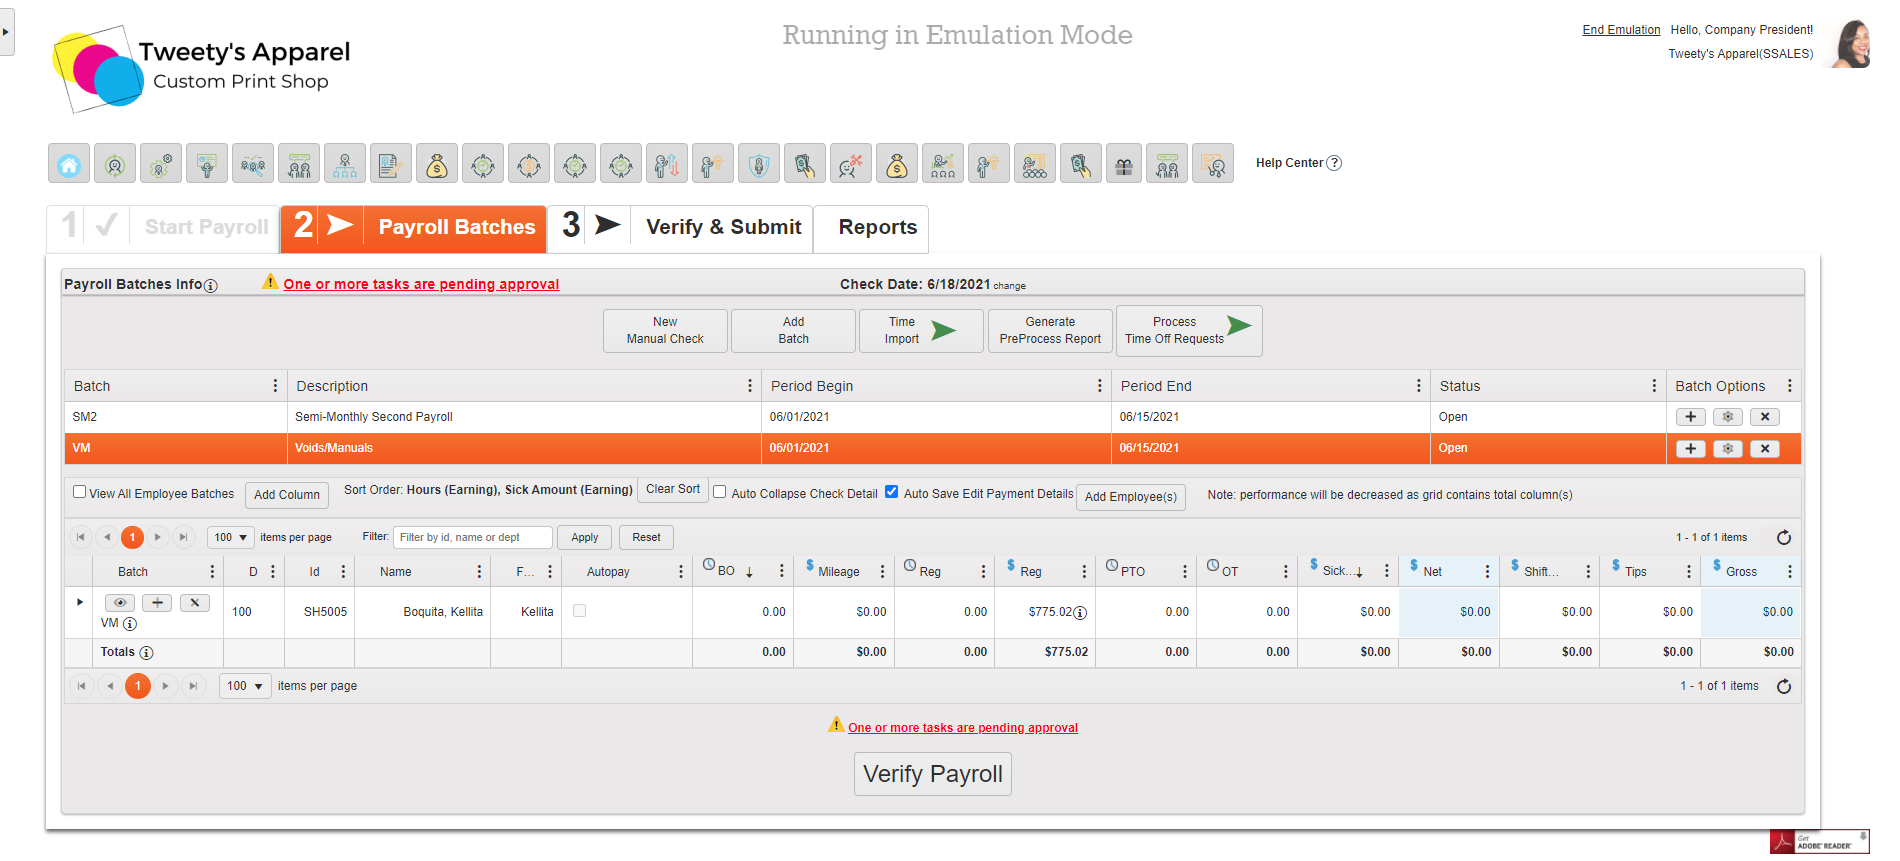
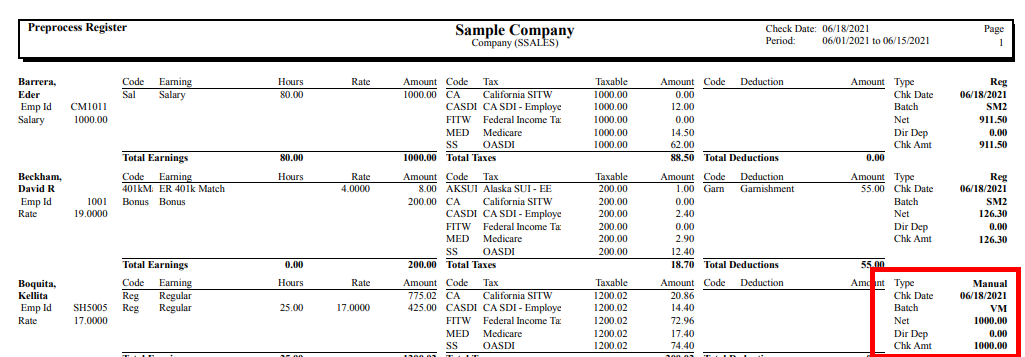
Then, when you process payroll for your next Check Date, you will be able to view the Manual Check on your Pre-Process register. Manual checks will have their Check Type as Manual, while regular checks from your payroll batch will have Reg as their Check Type.
Here, you can also verify the Batch, Check Amount (Net), and that there was no Direct Deposit (Dir Dep) for the Manual Check.
Top Tip: In this section, Dir Dep indicates which portion of the Net amount is issued via Direct Deposit while Chk Amt indicates which portion of the Net amount is issued via a physical check.
Comments
0 comments
Please sign in to leave a comment.