
Garnishments are involuntary deductions, meaning they are mandatory and usually levied by a Court, State, or Federal Agency. Neither employees nor employers have control over these deductions; however, it is the employer's responsibility to set up these deductions in payroll after receiving a garnishment order.
To begin setting up your garnishment, you must first set up the third-party agency in your HRIS portal. After this, to complete your garnishment setup, you will need to assign the deduction and agency to the employee.
Step-By-Step Instructions
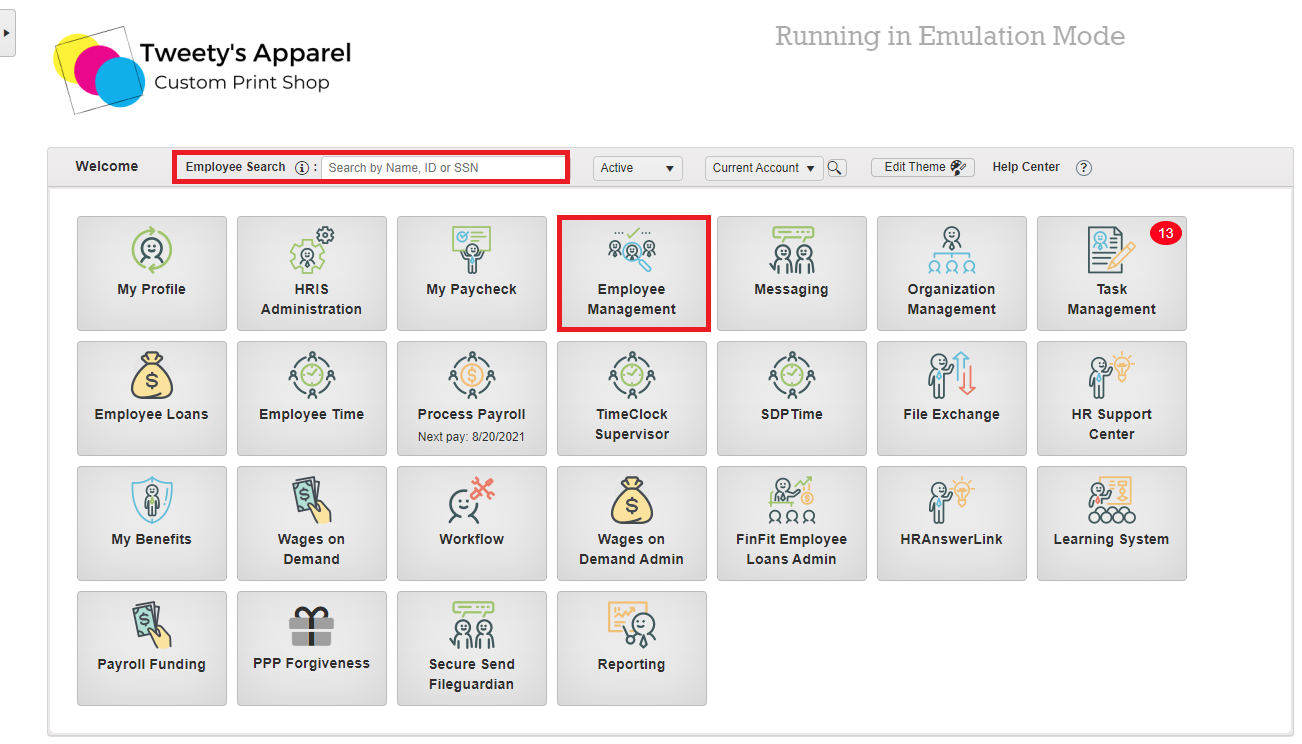
To begin, search for the employee you would like to add the garnishment to using either the Employee Search Bar on your HRIS portal home page or from within the Employee Management module to get to the employee's profile.
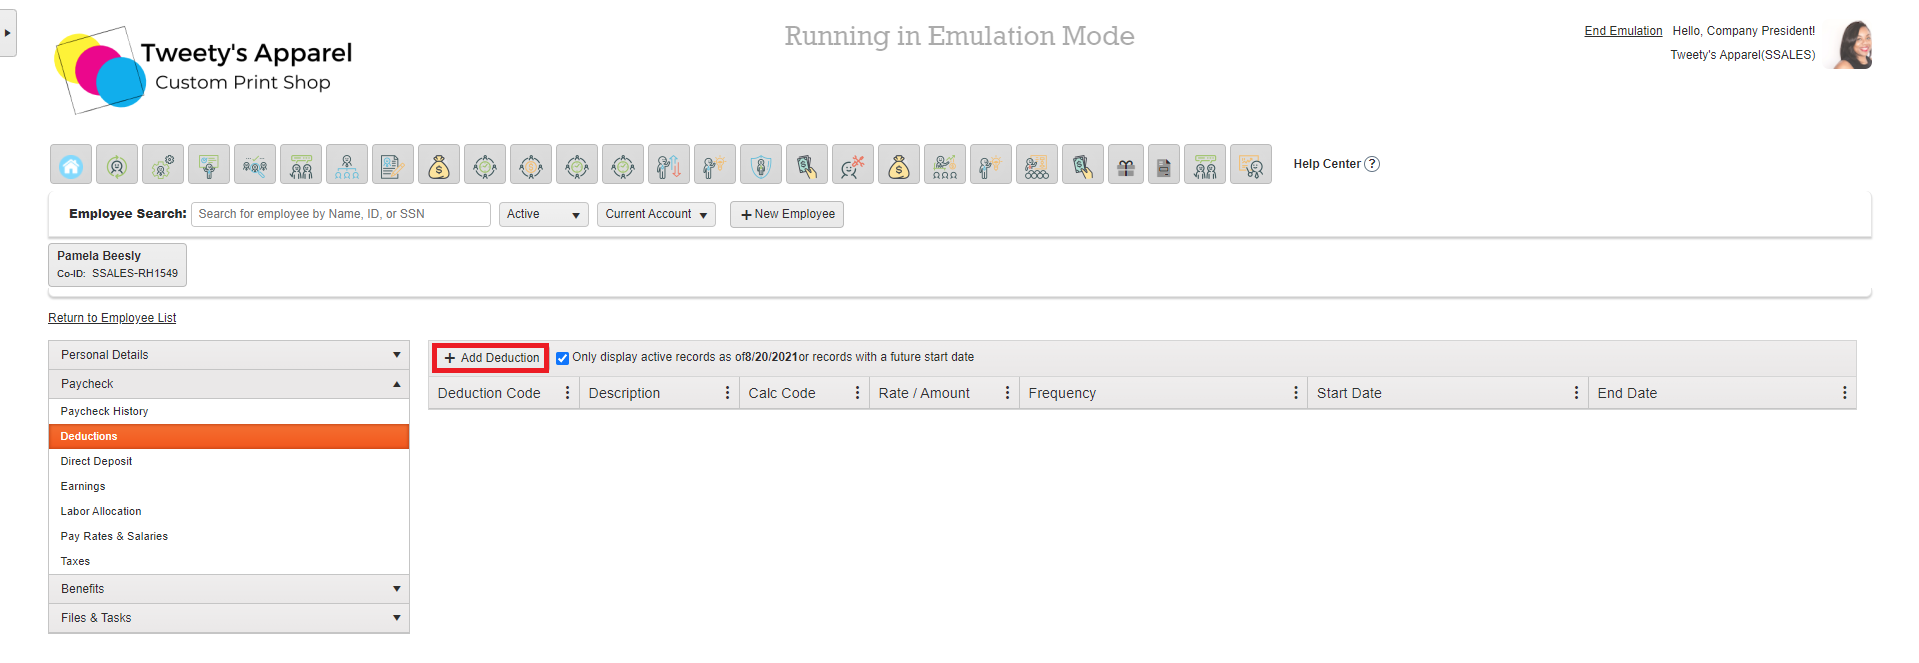
Once you have reached the employee's profile, click on the Paycheck tab from the left-side menu and select Deductions. From here, click +Add Deduction.
This will open a dialogue box for you to add the new deduction (scroll down for field descriptions).
Top Tip: Because this is the deduction setup box for all types of deductions, keep in mind that not all fields will be applicable to garnishments.
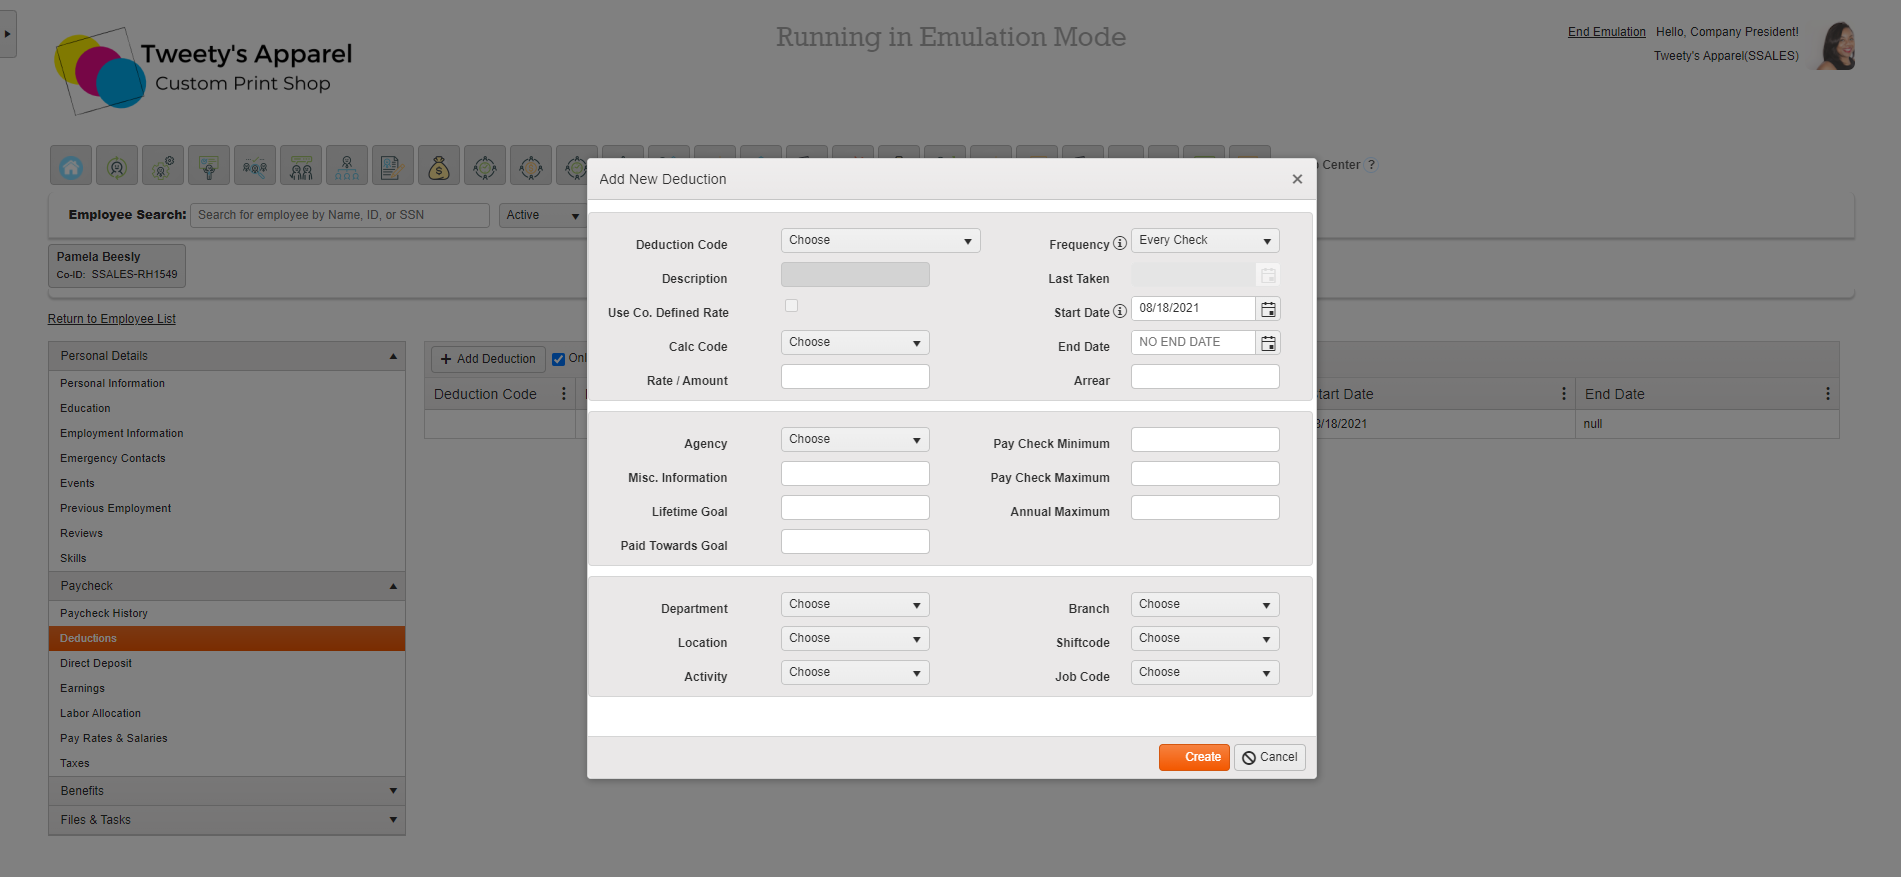
Once done, click Create to save your deduction, which will be live beginning on the next check date on or after your selected Start Date.
Top Tip: We like to create Payroll Notes for employees when setting up new deductions as a reminder to double-check that these apply correctly when processing payroll!
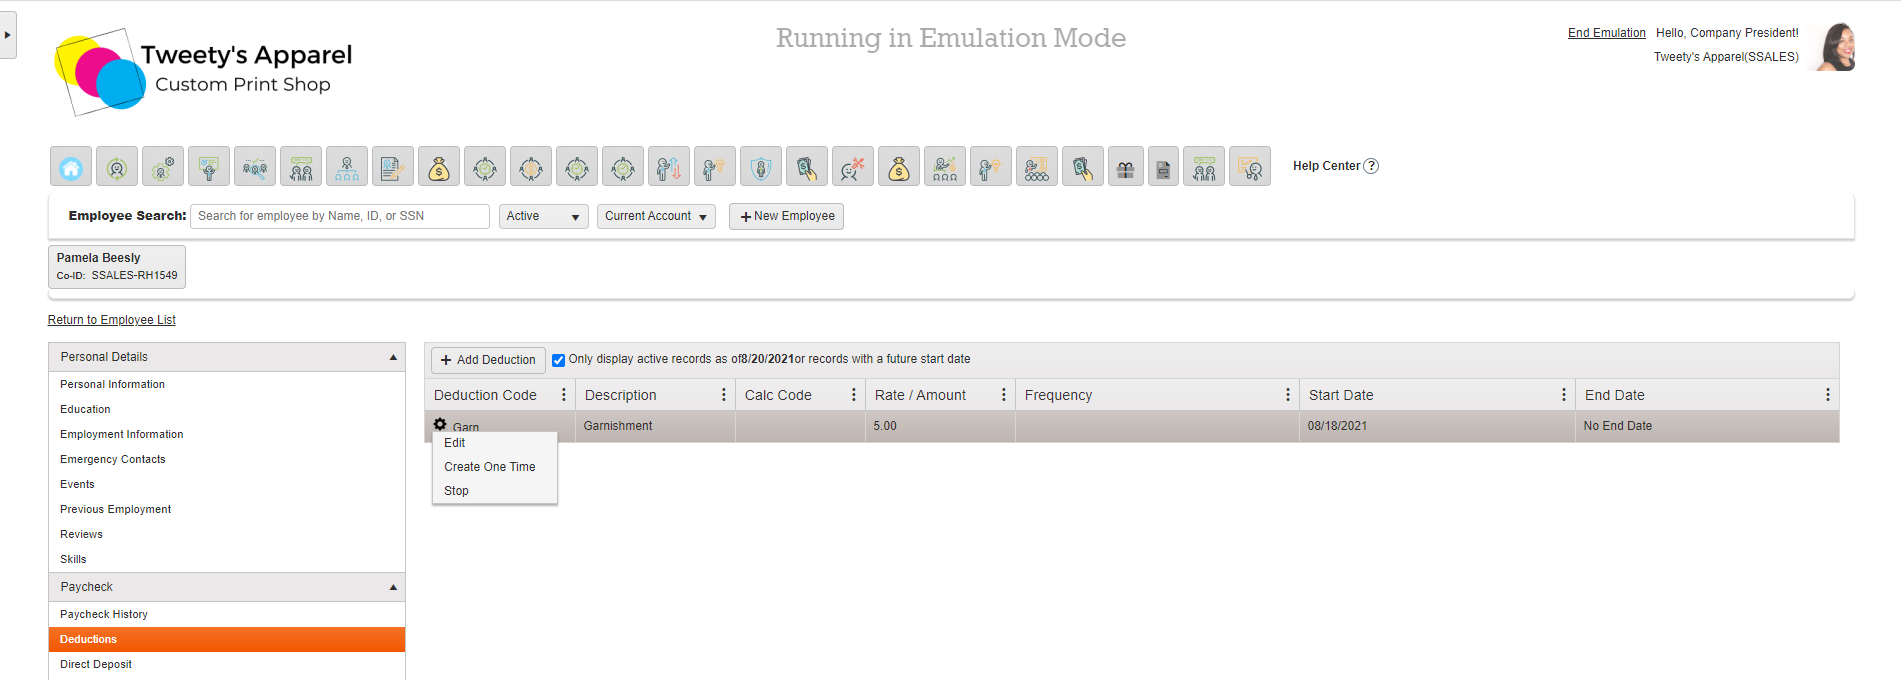
If you ever need to edit or stop this deduction in the future, you can come back to this screen and click on the Gear icon next to the deduction to Edit or Stop it. You can also select Add One Time Deduction to create an additional, one-time deduction to the selected agency.
Add New Deduction Field Descriptions
|
Field |
Description |
|
Deduction Code (required) |
The Deduction Code that will be used for the deduction. In this case, select the default Garn - Garnishment code unless you have created your own custom Deduction Code you would like to use. |
|
Calc Code |
This section will determine the deduction's calculation. Refer to the garnishment order for guidance on what should be deducted from the employee's paycheck. Common calculations for garnishments include:
|
|
Rate / Amount (required) |
Here you will enter the garnishment amount specified in your garnishment order to perform the deduction calculation based on our Calc Code selection. Example:
|
| Frequency | Per the garnishment order, select how frequently the deduction should be taken. The default is Every Check, but you can select other frequencies from the drop-down menu as needed to comply with the garnishment order. |
| Start Date | Select the Start Date for the deduction, as specified in the garnishment order. Check dates will be highlighted in green, but if you select a Start Date that is not a check date, you will see the deduction begin on the next check date following your Start Date. |
| End Date | If the garnishment order specifies a specific End Date for the garnishment, you can enter it here. Otherwise, leave this blank. |
| Arrear | Leave this field blank. This will be auto-populated by our system if a deduction goes into Arrears because the employee did not earn enough to make the deduction. |
| Agency | Use the drop-down menu to select the garnishing agency. If the agency has not yet been added and is not listed on this drop-down menu, you can set up the agency here. |
| Misc. Information | Use this field to enter the Case # or Order # for the garnishment. Note that this will be printed on the garnishment check for the garnishing agency's reference. |
| Lifetime Goal | If the garnishment is for an employee to pay up to a certain amount (for example, taxes owed or loan repayment), you can enter the goal amount in this field. This will stop the deduction from being taken out after the Lifetime Goal amount has been repaid. |
| Paid Towards Goal | Leave this field blank. Our system will automatically update this field when payroll is processed to record how much the employee has paid up until this point. |
| Pay Check Minimum |
Optional - This sets a minimum limit on the amount that can be taken from an employee's paycheck. For example, if you wanted to deduct 50% of an employee's net paycheck and no less than $1,000 they could set a Pay Check Minimum of $1,000. As each agency has its own requirements, please refer to your garnishment order or garnishing agency for guidance on valid/invalid paycheck minimums if you are considering adding these. |
| Pay Check Maximum |
Optional - This sets a maximum limit on the amount that can be taken from an employee's paycheck. For example, if you wanted to deduct 50% of an employee's net paycheck and no more than $1,000 they could set a Pay Check Maximum of $1,000. As each agency has its own requirements, please refer to your garnishment order or garnishing agency for guidance on valid/invalid paycheck maximums if you are considering adding these. |
| Annual Maximum |
This is the largest amount of money the you would like deducted over the course of a calendar year. Note that this is different than the Lifetime Goal which tracks a deduction over an unlimited amount of time. The Annual Maximum instead enforces this maximum for a calendar year. As each agency has its own requirements, please refer to your garnishment order or garnishing agency for guidance on valid/invalid annual maximums if you are considering adding these. |
| Department | Optional - If you would like this deduction to be associated with a specific Department for reporting or job costing purposes, you can specify the Department here. |
| Location | Optional - If you would like this deduction to be associated with a specific Location for reporting or job costing purposes, you can specify the Location here. |
| Activity | Optional - If you would like this deduction to be associated with a specific Activity for reporting or job costing purposes, you can specify the Activity here. |
| Branch | Optional - If you would like this deduction to be associated with a specific Branch for reporting or job costing purposes, you can specify the Branch here. |
| Shiftcode | Optional - If you would like this deduction to be associated with a specific Shiftcode for reporting or job costing purposes, you can specify the Shiftcode here. |
| Job Code | Optional - If you would like this deduction to be associated with a specific Job Code for reporting or job costing purposes, you can specify the Job Code here. |
Comments
0 comments
Please sign in to leave a comment.