
While some data like employee addresses, SSNs, and birthdays may be standard procedure to collect regardless of your business, we know that from time to time you may have specific employee data needs that are specific to your organization.
Whether that is security access level, which warehouse an employee is in, whether they're participating in your company's wellness challenge, or even their favorite birthday cake flavor or any food allergies, we've developed the ability to create custom fields so that you can record any information you need to keep track of in your HRIS portal.
How to Create Custom Fields
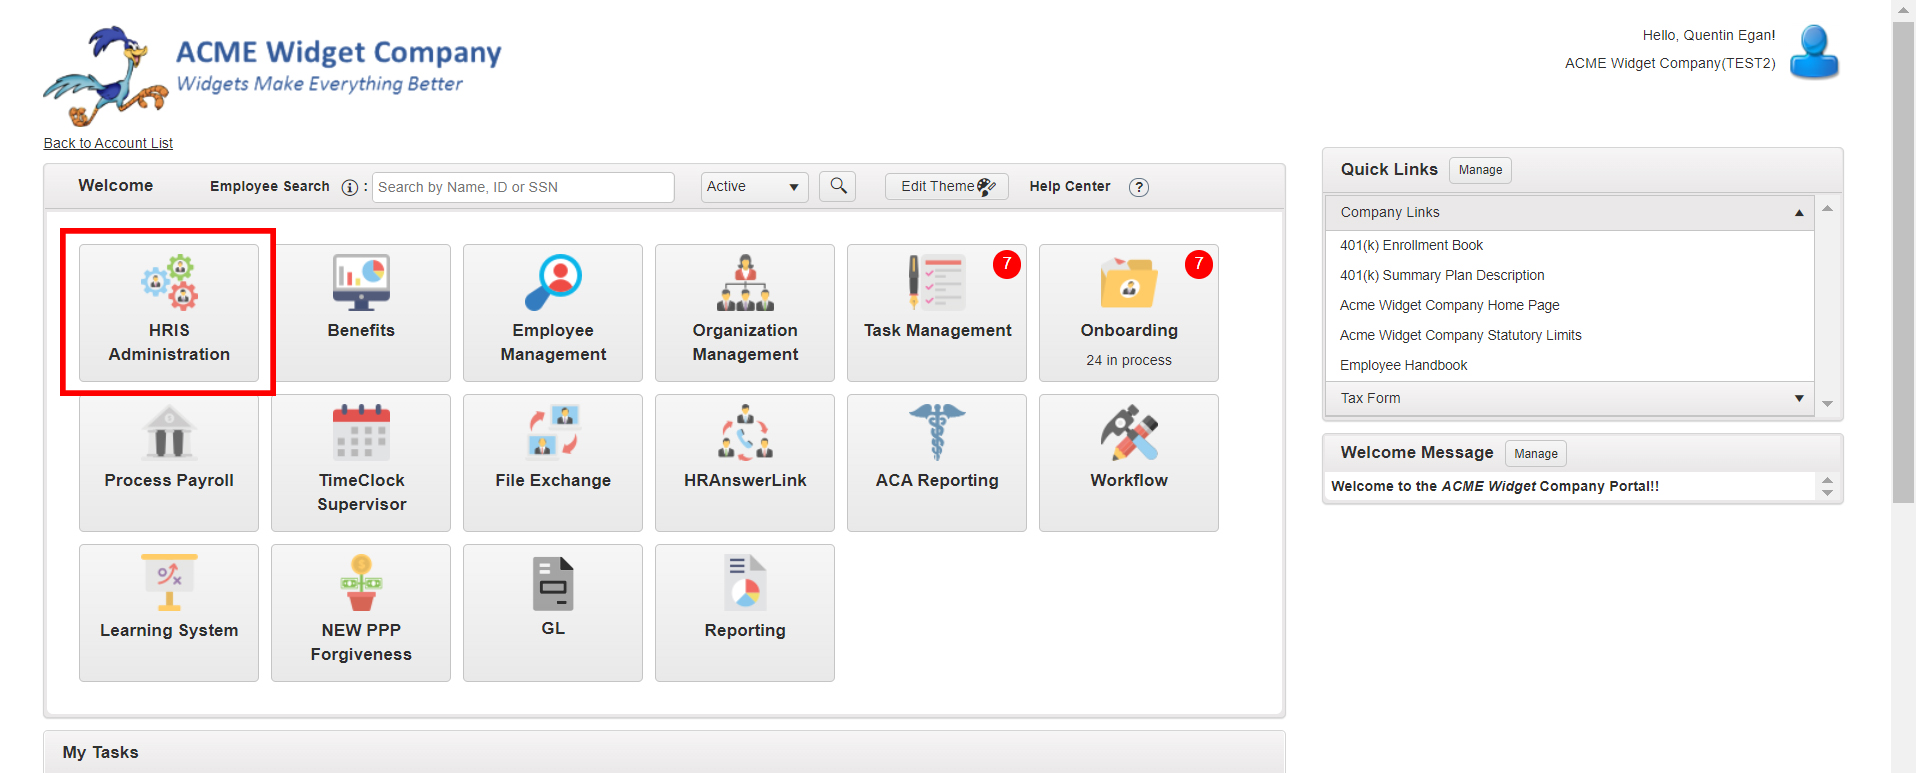
To get started, you'll first launch the HRIS Administration Module.
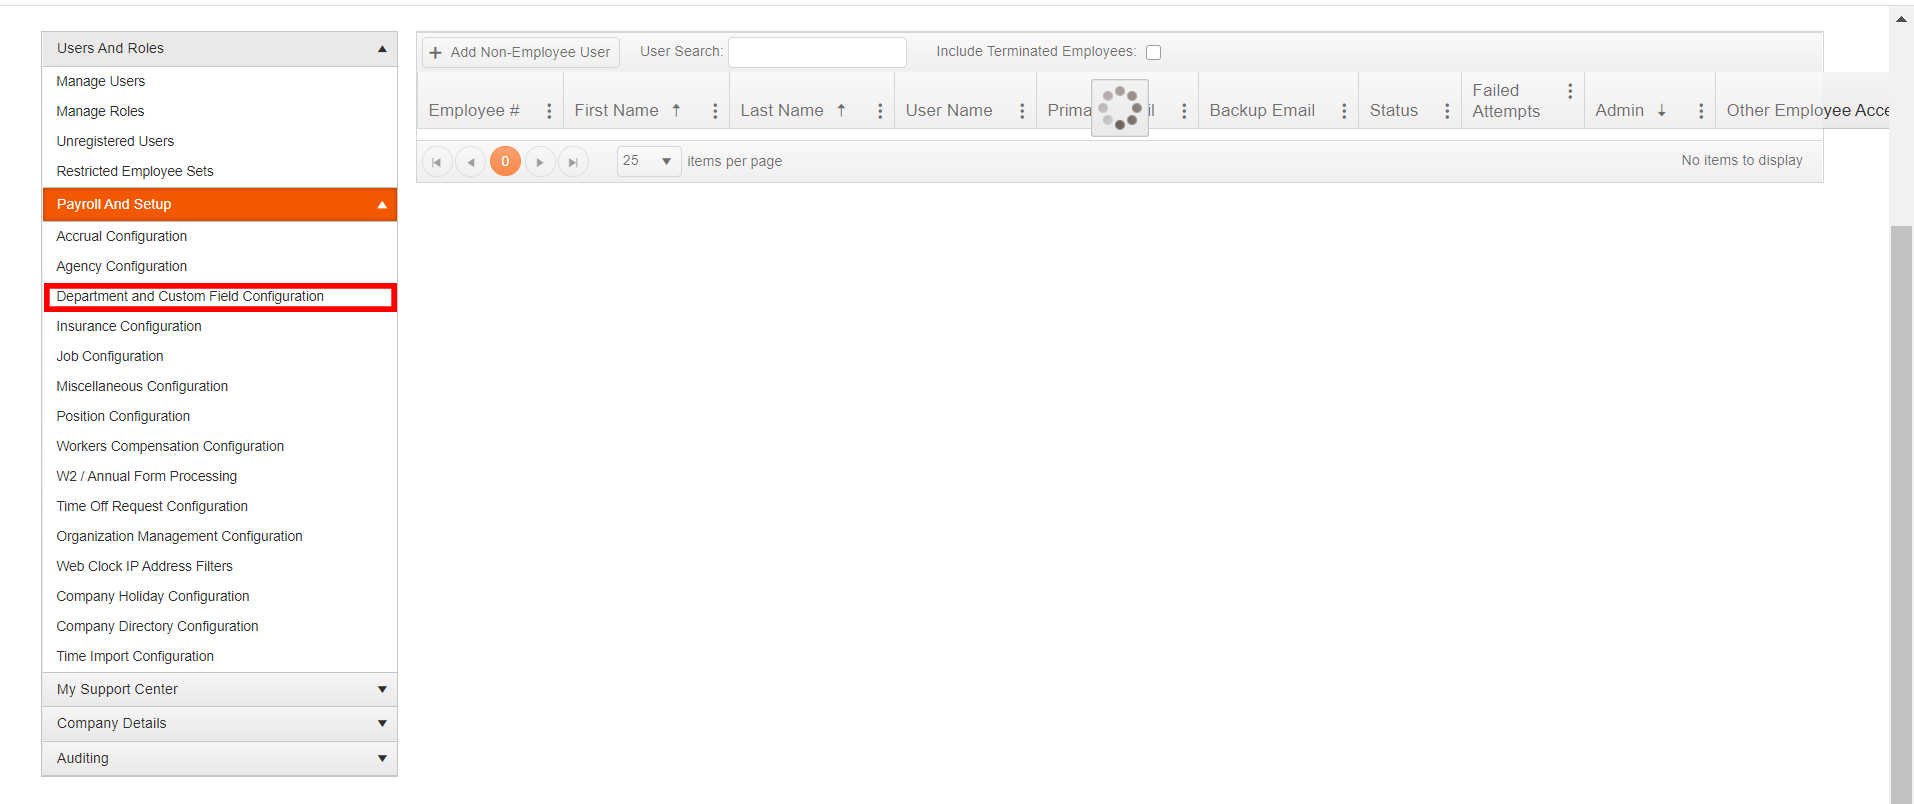
Next, click on the Payroll and Setup drop-down menu on the left and select Department and Custom Field Configuration.
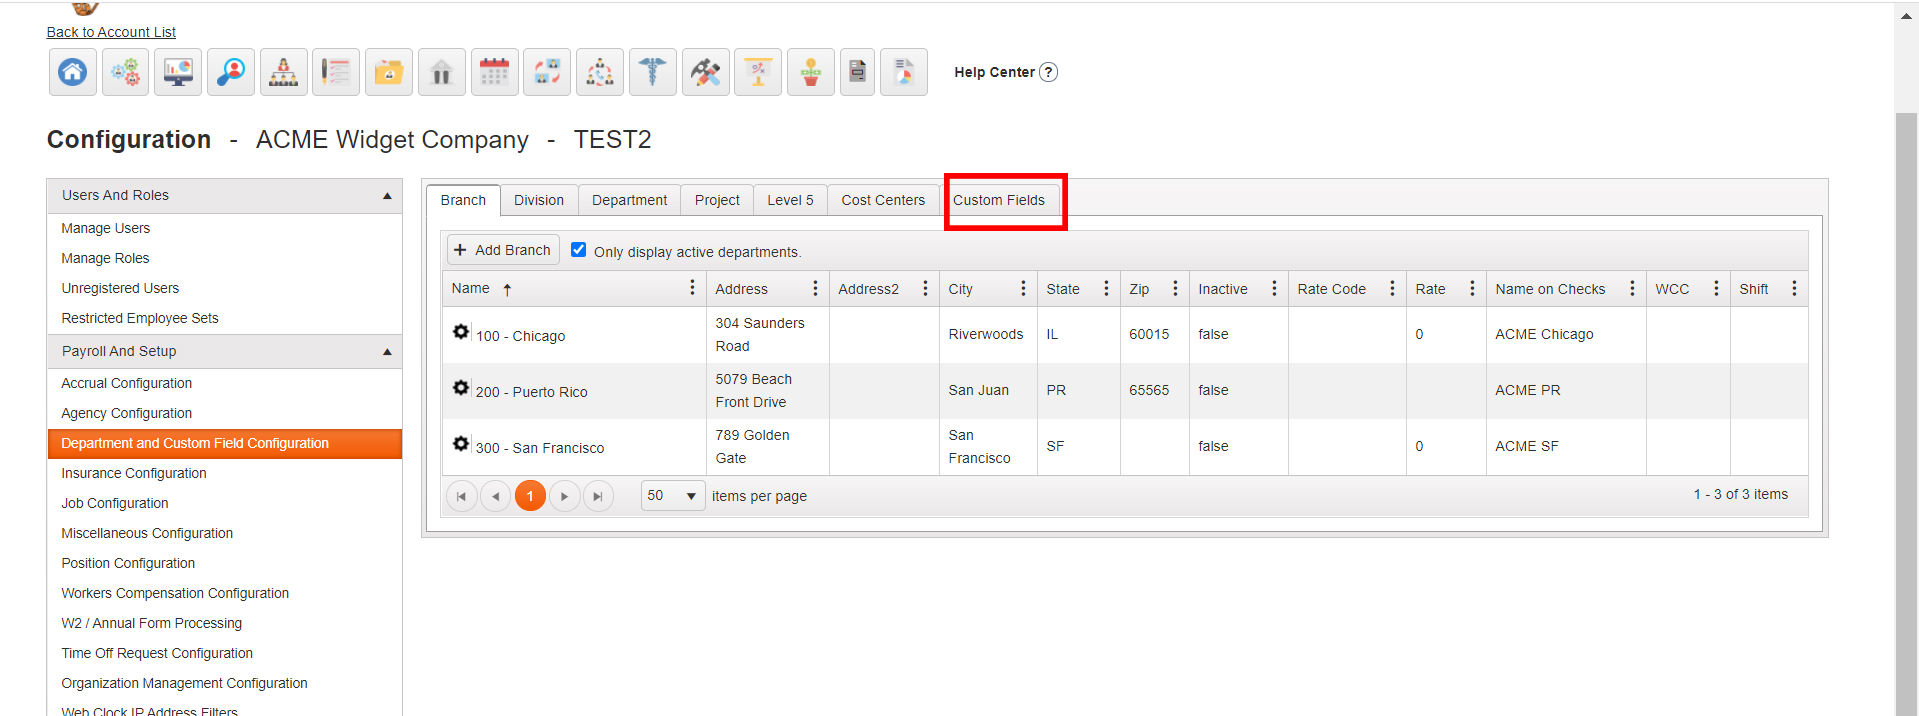
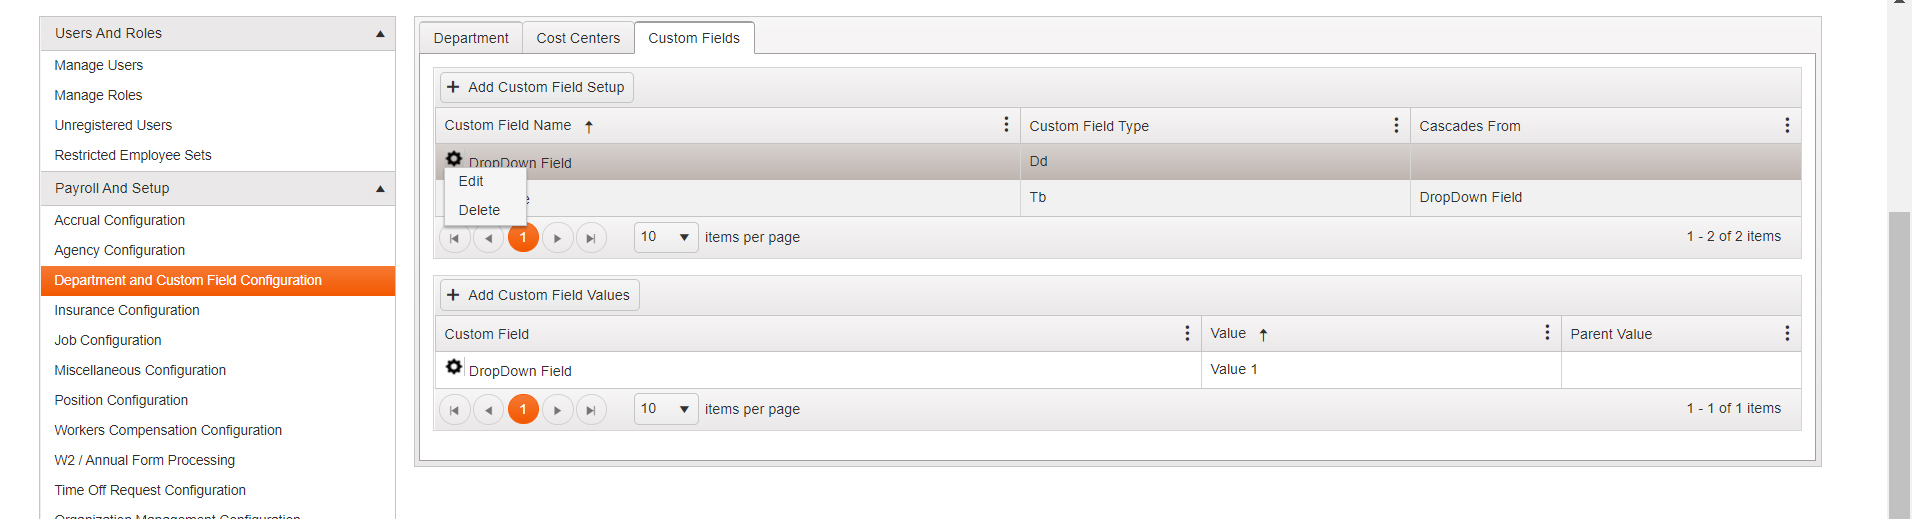
Then, select the Custom Fields tab at the top right.
Here is where you can create and edit custom fields. To add a new custom field, select the +Add Custom Field Setup button.
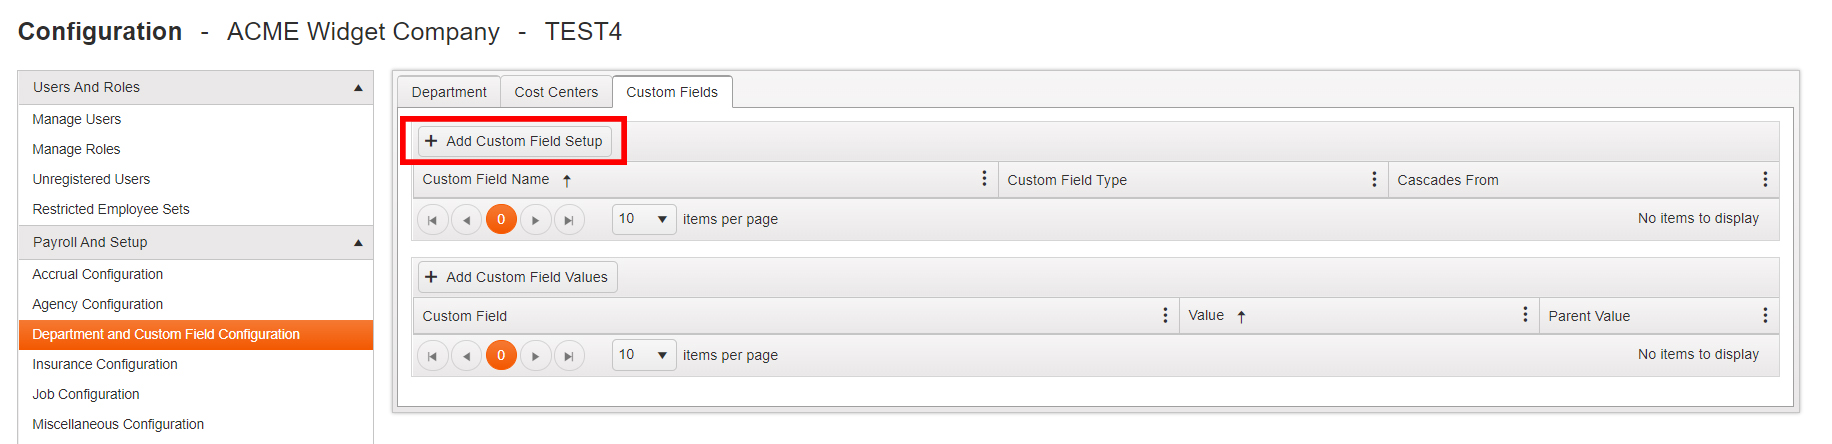
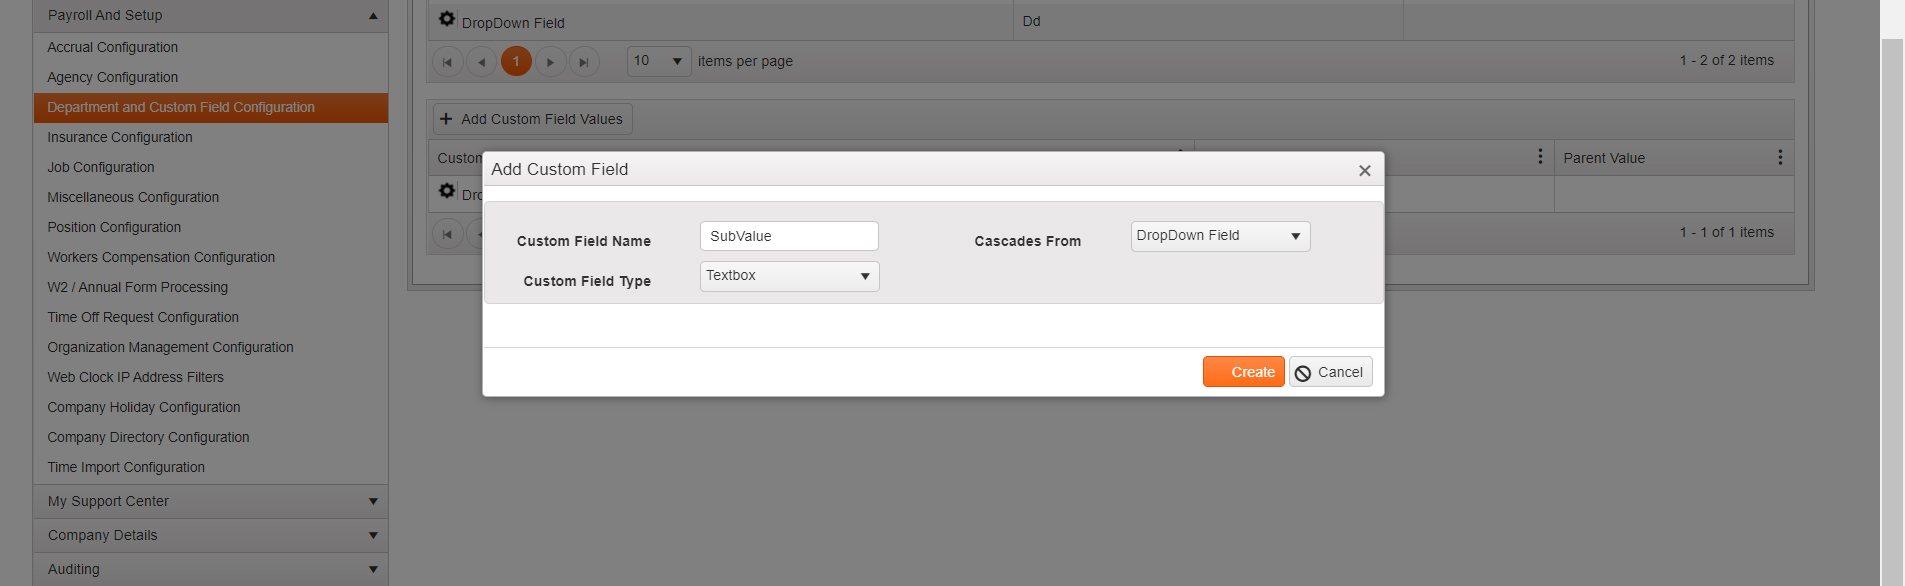
This will bring up the Custom Field Creation wizard.
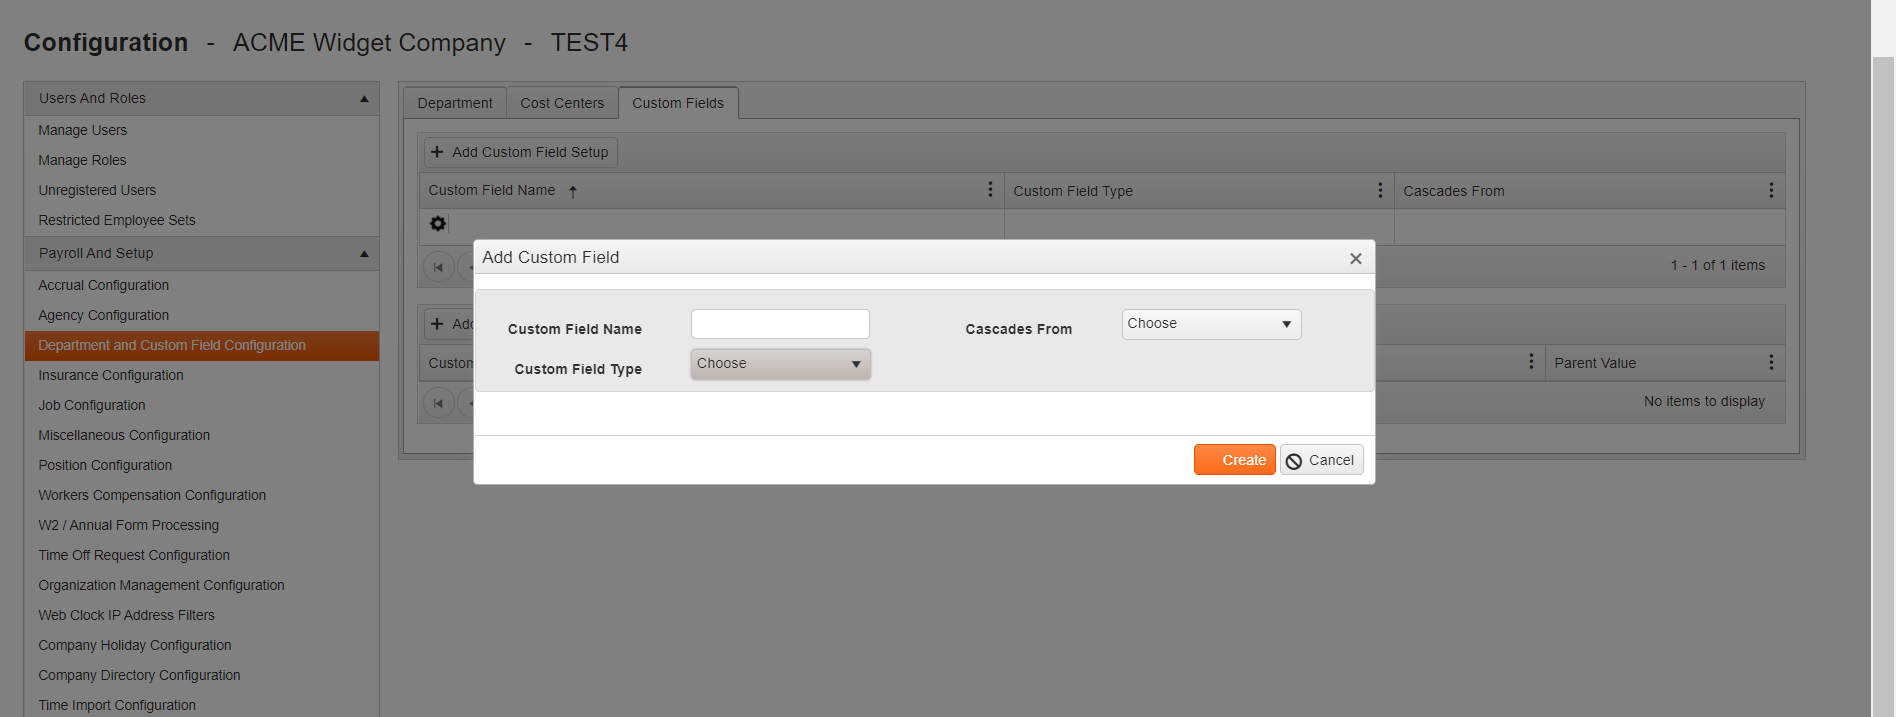
From here, you will enter the following information:
- Custom Field Name - The display name for your custom field on the employee's profile and in reports. For example, "Location", "Access Level", or "Birthday Cake Flavor"
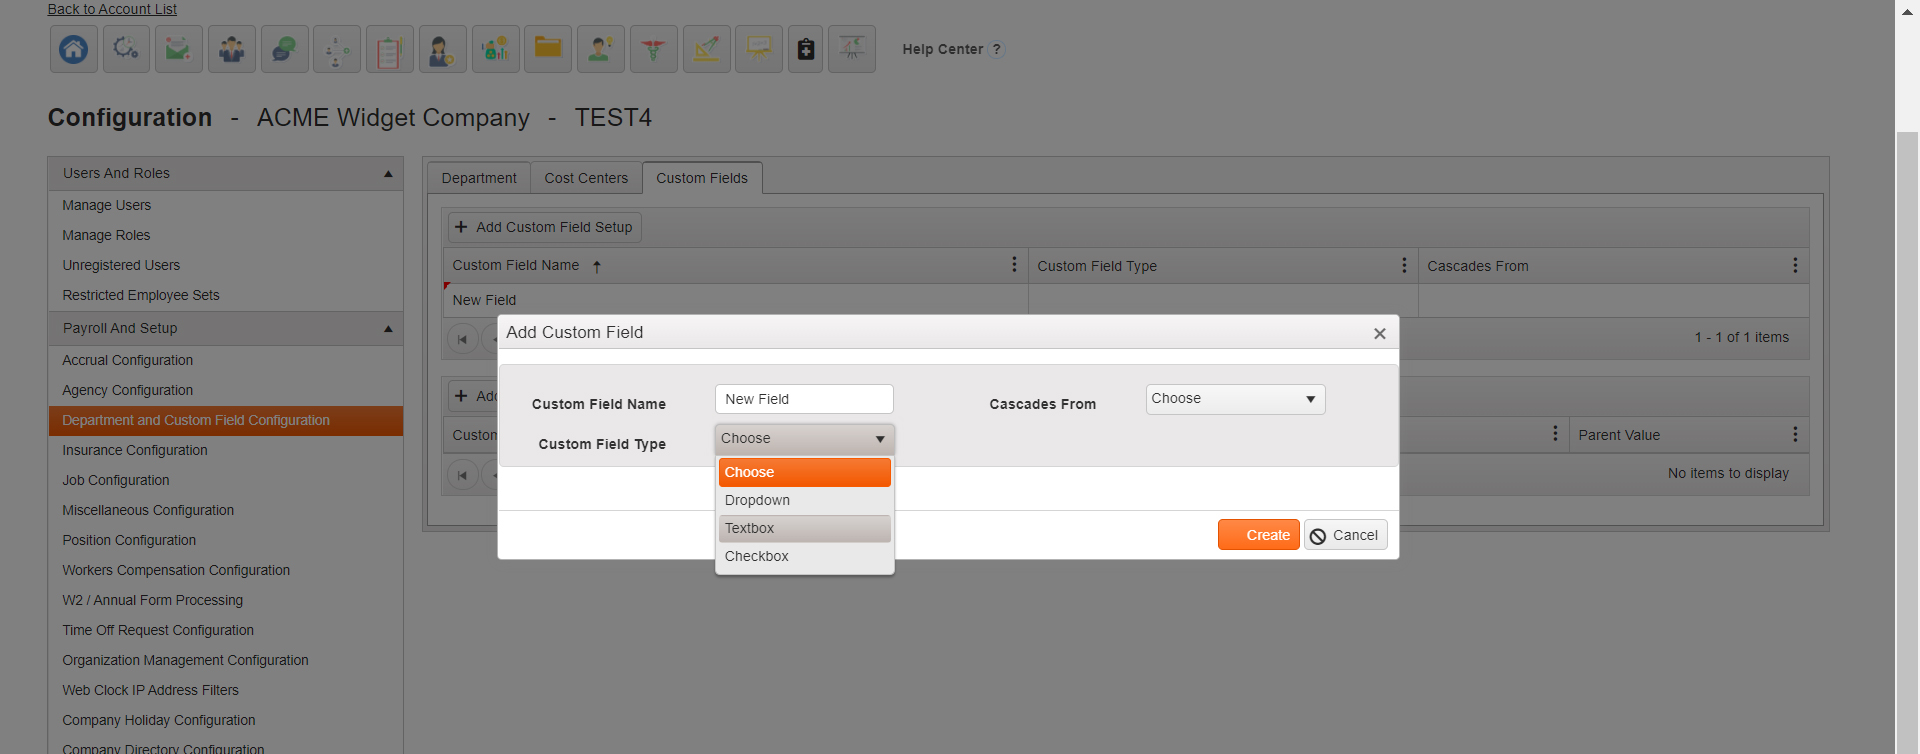
- Custom Field Type - You can select for your data to be either a text box, check box, or drop-down list
- Cascades From - This field is optional. If you would like your custom field to nest within another custom field for more specific information based on their prior selection, you can select this here. (For example, if after selecting which location an employee is working at, you wanted to provide information on which specific building they are in) Note: The custom field you are cascading from must already be created before you can choose this option.
Once all custom field information has been entered, click Create.
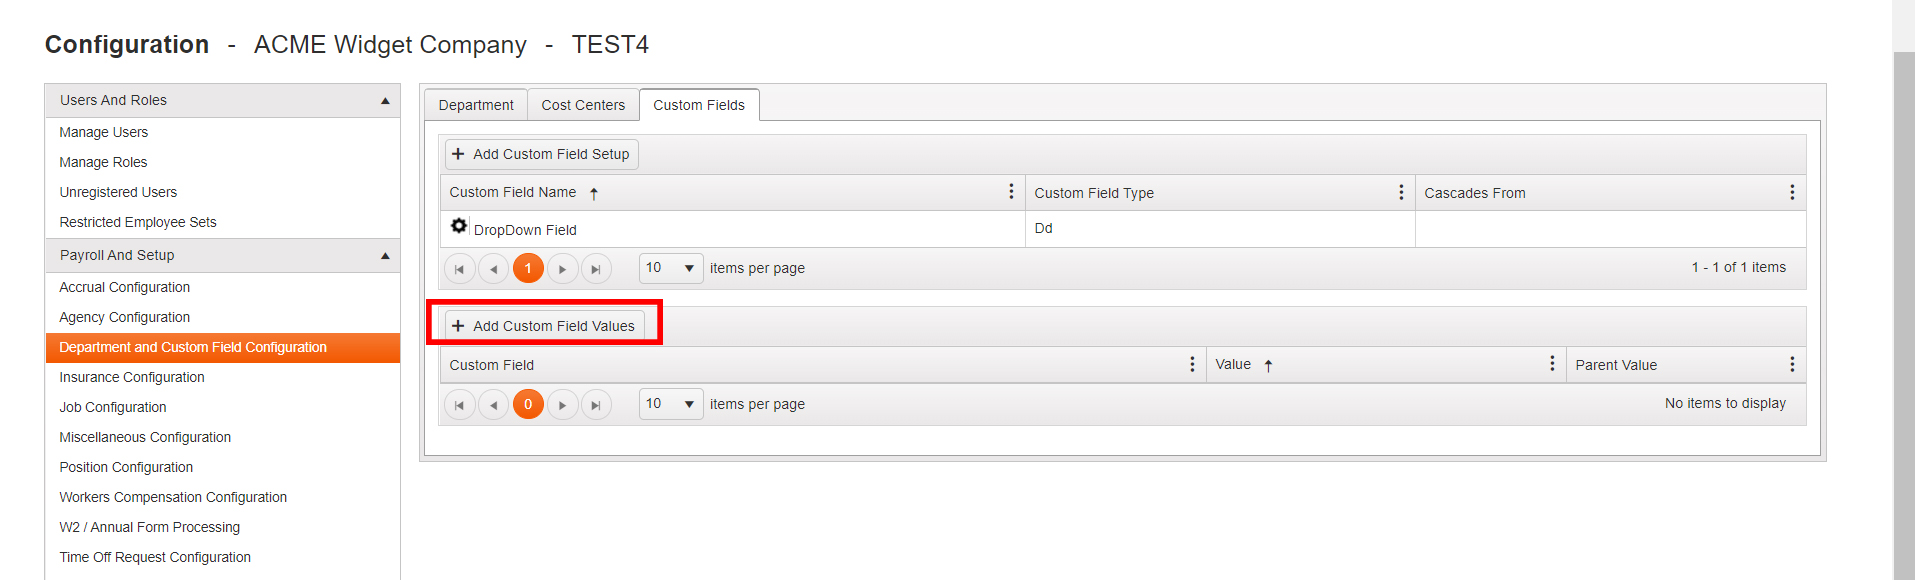
If your field is a text box or check box, then you are finished! However, if you are using a drop-down menu field type, you will use the next +Add Custom Field Values section to add your drop-down menu values.
Drop-Down Menu Configuration
For each drop-down menu option you would like to add, click +Add Custom Field Values.
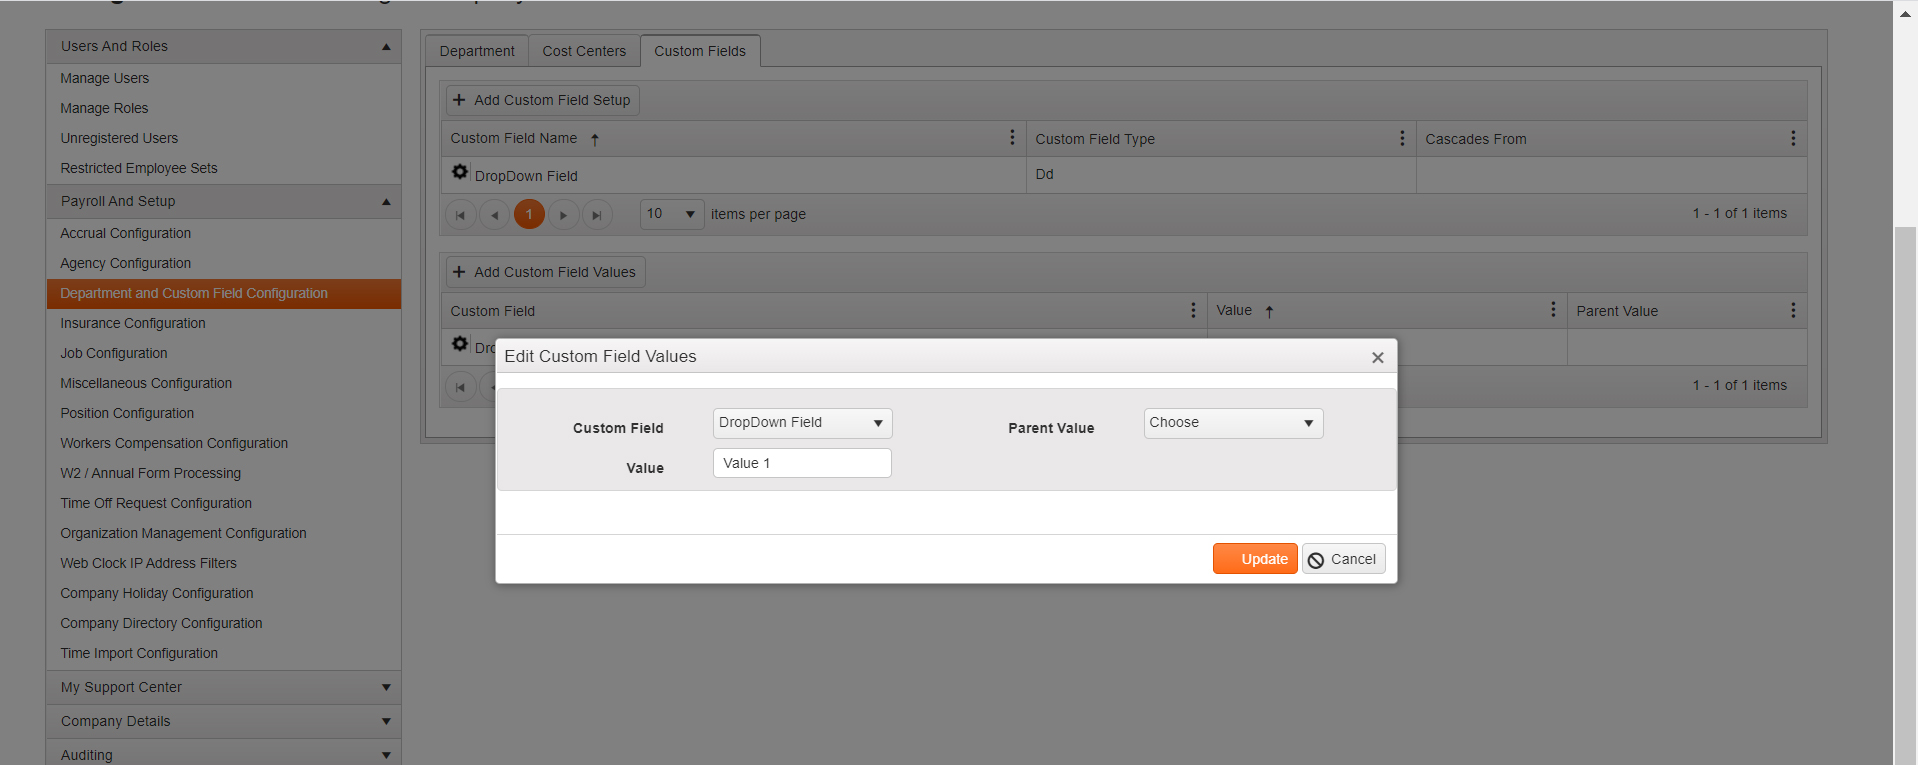
Here you can select:
- Custom Field - Which of the custom fields you just created this menu option will be listed under
- Value - The display name for your value (for example, if the custom field is "Building", you may want to create values for "Warehouse A", "Warehouse B", and "Warehouse C".
- Parent Value - This field is optional. If the value you are creating is nested within another drop-down menu option, select which one this should nest from here. For example, if when selecting "Warehouse A" above you wanted to provide the additional drop-down options of "Distribution", "Packaging", and "Receiving". Note: You will need to first create the parent value before creating any sub-values to be able to assign them to the parent value.
Reminder: Cascading or "Nested" Fields
As a reminder, once you have created one field you can create sub-fields from the custom field you created.
To do this, select the +Add Custom Field Values button and select the field from the Cascades From menu:
Ongoing Maintenance
If you ever need to change your custom field configuration, you can edit these fields at any time by hovering over the gear cog and selecting the Edit button. (You can also Delete them if you no longer need to record this information.)
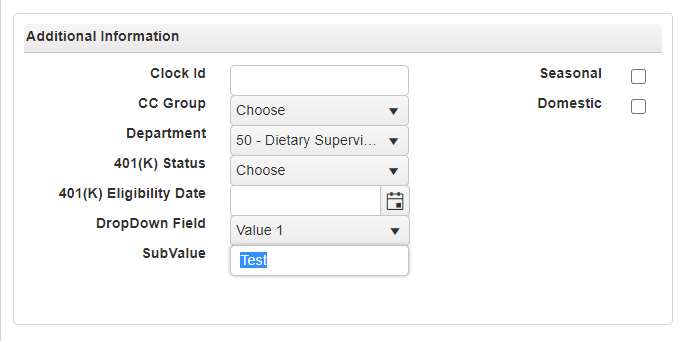
Viewing Your Custom Fields
After you finish setting up your custom fields, you can view them in the Employee Management module > Employment Information > Additional Information.
For example, here are two sample custom fields: DropDown Field and SubValue.
Comments
0 comments
Please sign in to leave a comment.