
Perhaps one of the most basic functions of your HRIS portal is terminating employees in the system. Keeping updated employee records is critical for accurate reporting and keeping your payroll grid and reports uncluttered by inactive employees. Fortunately, terminating employees is a breeze in the Employee Management module.
How to Terminate Employees
Instructions
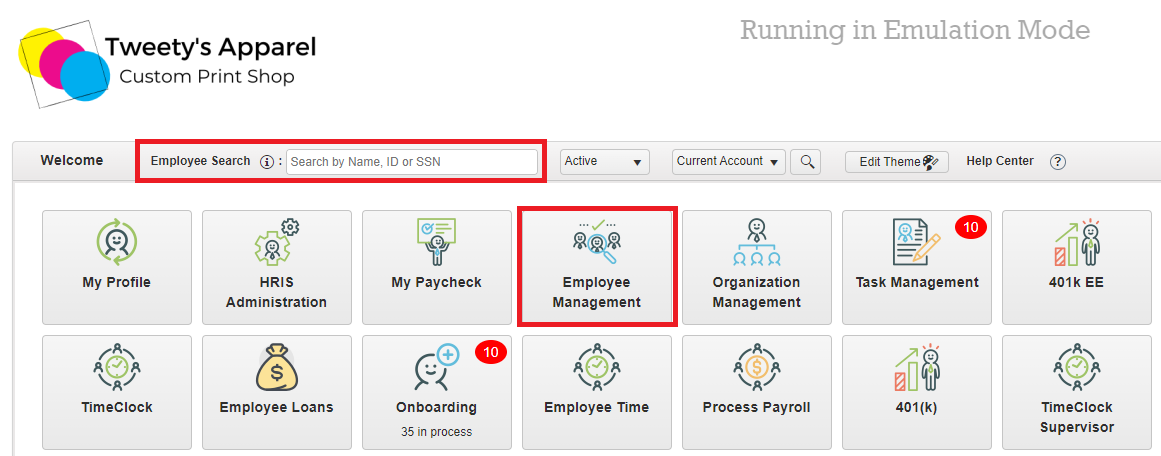
To terminate (fire) an employee in the system, start by launching the Employee Management module.
Top Tip: To reduce your number of clicks, you can also use the Employee Search bar on your home screen to go straight to the employee you need!
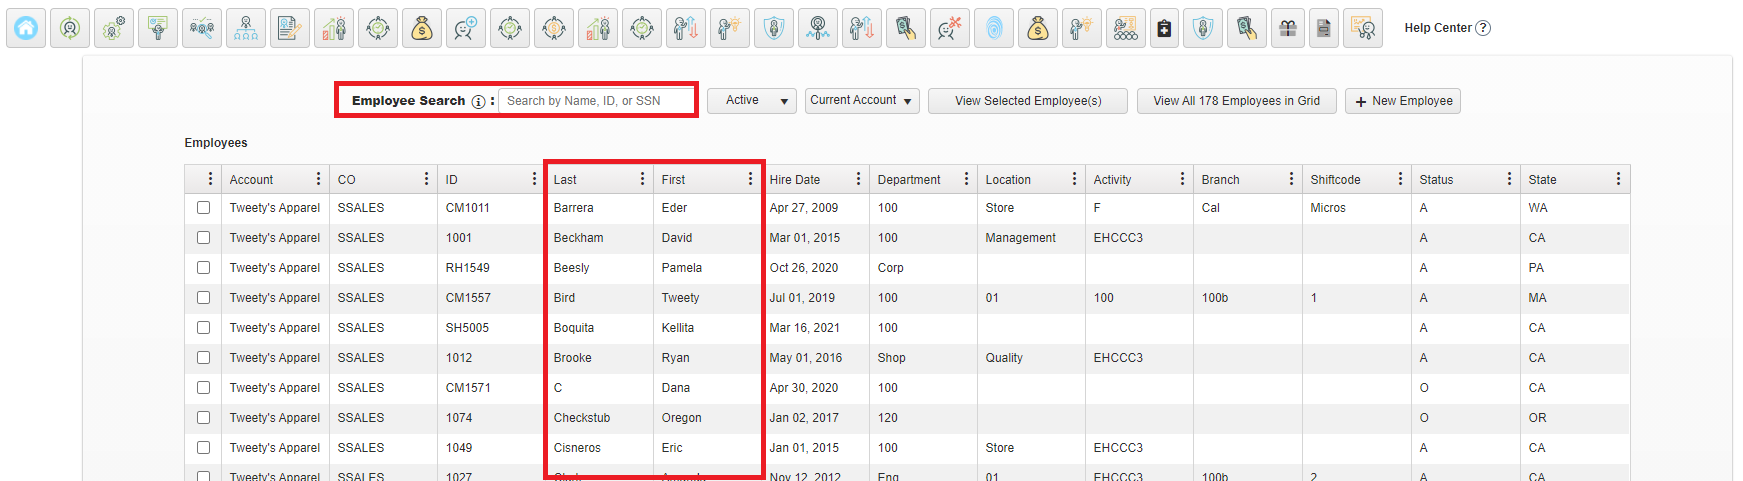
From here, scroll through your employee list or use the search bar at the top of the page to find the employee you would like to terminate. Then, click on their name to access their profile.
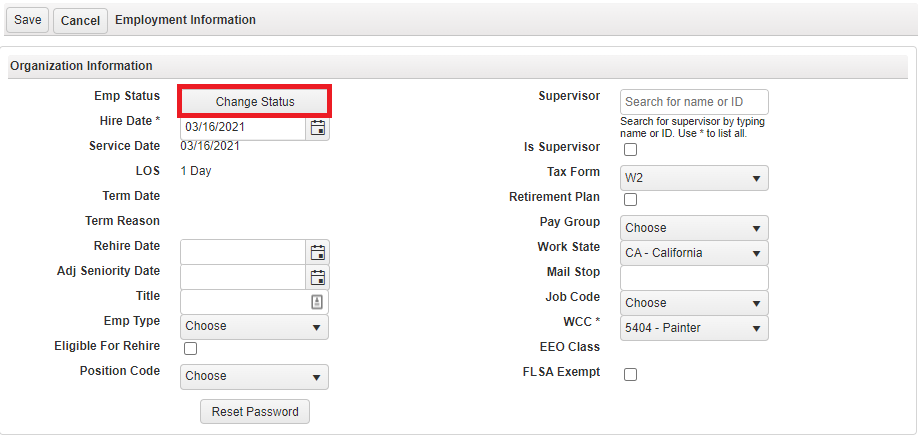
Then, select Employment Information under Personal Details and click Edit.

From here, we'll select Change Status to change the employee's Active status to Terminated.
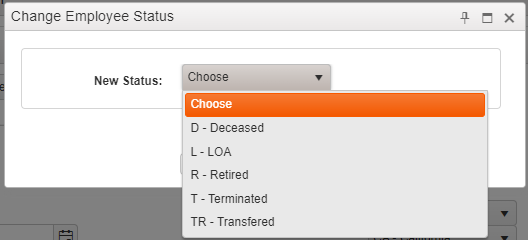
This will bring up a dialogue box for you to select the employee's new status. If you are terminating the employee, you can select T - Terminated and then click OK. However, you can also change the employee's status to Deceased, Leave of Absence (LOA), Retired, or Transfered as appropriate.
Once you click OK, our system will remove the employee from any current access roles that have been assigned to them in the system and add them to the "Term" role.
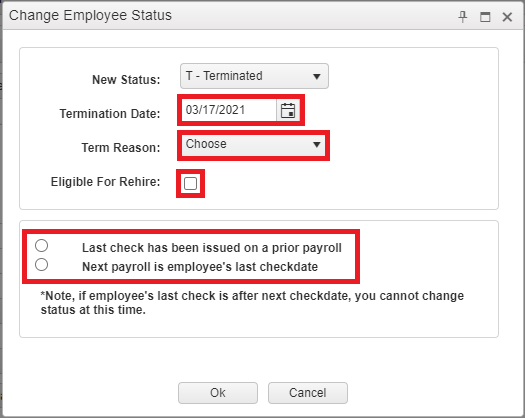
Next, you will be prompted to fill in a few more details to confirm the termination.
- Termination Date
- Termination Reason
- If the employee is eligible for rehire (for your internal records only)
Top Tip: If you don't see a reason that fits this situation, you can add or edit your list of Term Reasons to better fit your business needs from the HRIS Administration module > Payroll And Setup > Miscellaneous Configuration > Termination Reason.
Lastly, you will select if the employee's last check has already been issued on a prior payroll, or if the next payroll you process will be the employee's last check date.
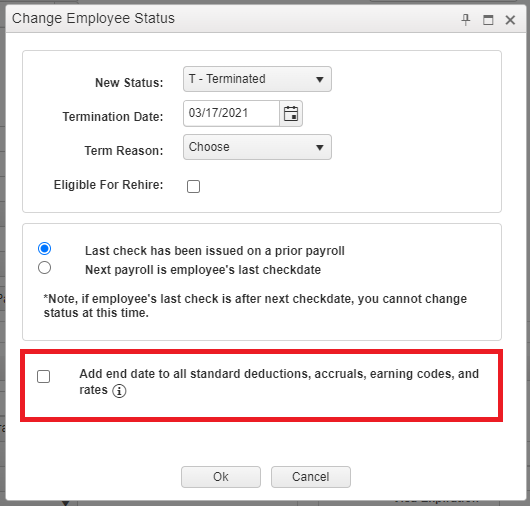
After making your selection, you will be asked if you would like to end date the employee's standard deductions, accruals, earning codes, and rates (insurance coverage will not be affected.)
Top Tip: We recommend checking this box to end date these components of the employee profile upon termination. This helps prevent incorrect data from being used if the employee is rehired. If you do rehire the employee, you will have the option to re-instate some of the employee's previous information during the rehire process.
If you select the option to end date and have not already issued the employee's final check on a prior payroll, you will be asked if you would still like to include the employee's standard deductions on their final check or not (based on the situation).
Once you have made your selections, click OK to complete your termination.

Top Tip: If you selected your next payroll as the employee's last check date, you will need to issue the employee's final check as a Manual Check.
Your employee will officially be removed from all previous roles and added to the "Term" role. Now that they are terminated, the employee will also no longer show up in your payroll grid when processing payroll.
Congratulations, you've just successfully terminated an employee!
Viewing Terminated Employees
If you ever need to re-access a terminated employee's information (whether to rehire them or just to access the data), you can always find them in the Employee Management module.
Just be sure to change your filter to view Terminated or All employees as the default is to show Active employees only!

Comments
0 comments
Please sign in to leave a comment.