
System security in your HRIS Portal is based on the concept of customizable roles. A user can be assigned to multiple roles, with each role having customizable account settings, field settings, and module settings.
In addition to setting up roles to view specific information, you can also configure a role's editing permissions. Sections and fields can be set to read-only, editable, or editable pending manager approval.
These approvals are set up using Approval Templates.
Tutorial Video
Step-By-Step Instructions
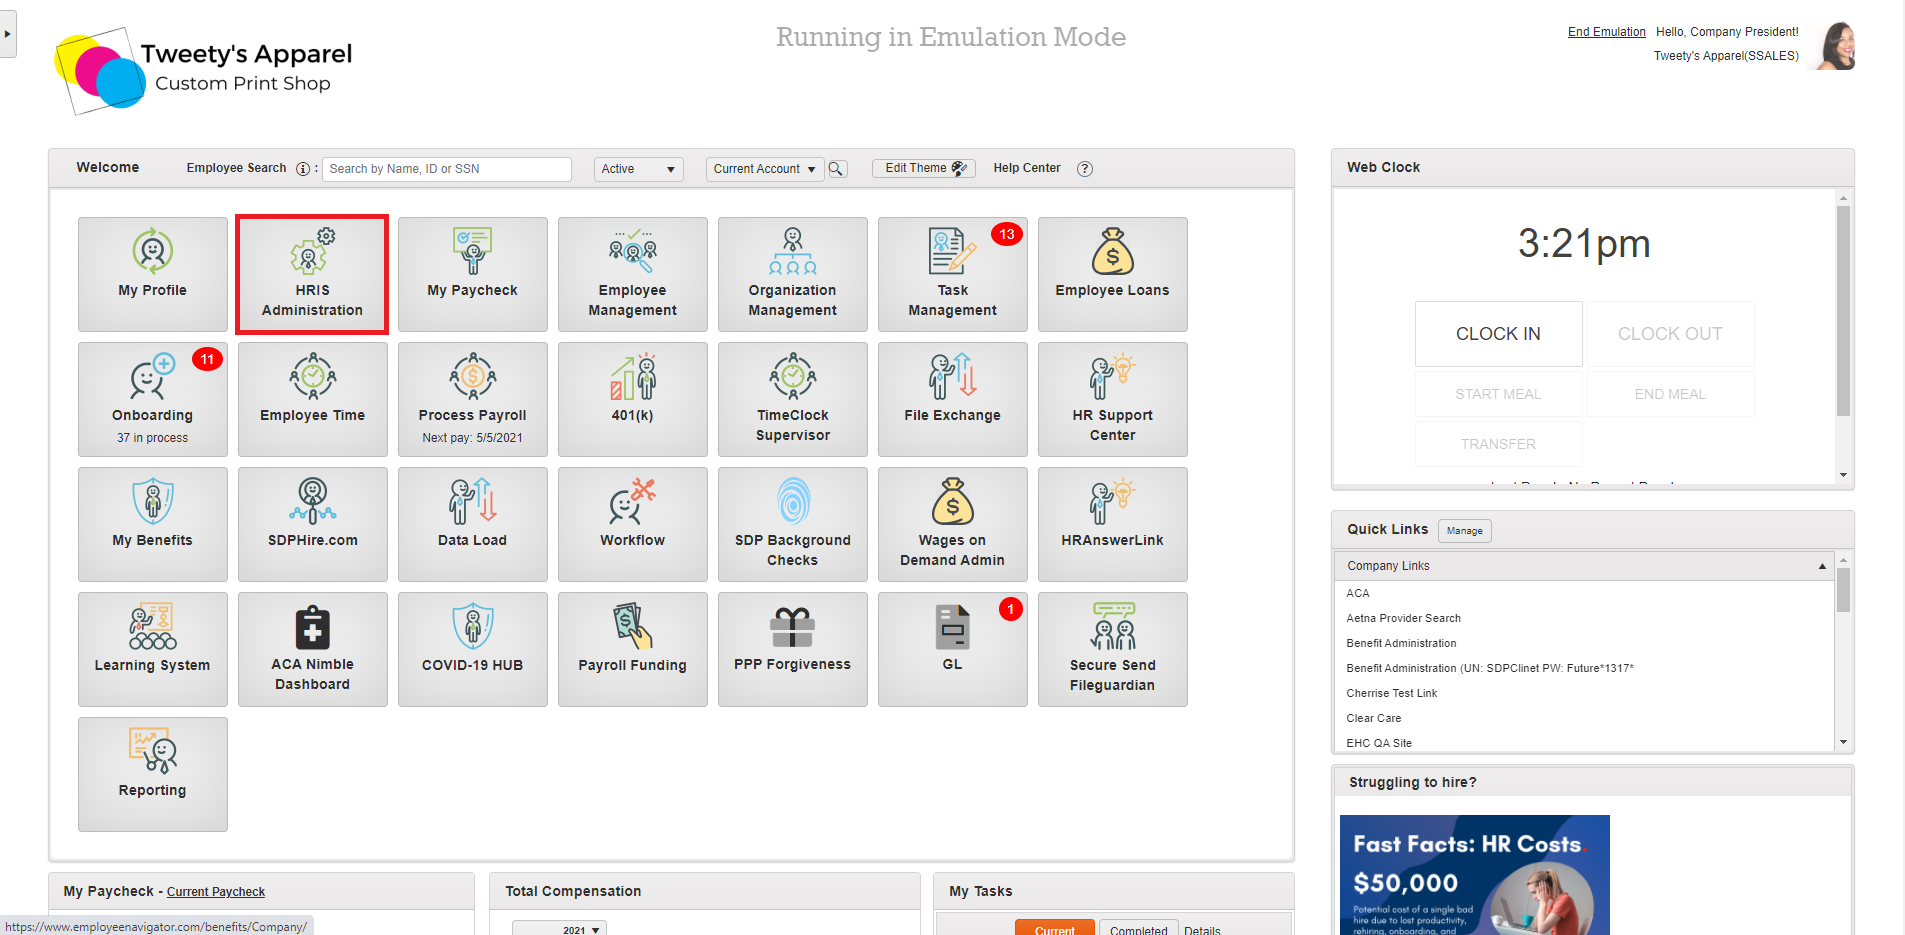
To begin, launch the HRIS Administration module from the home screen of your HRIS portal.
Then, select Manage Roles from the side menu under Payroll And Setup.
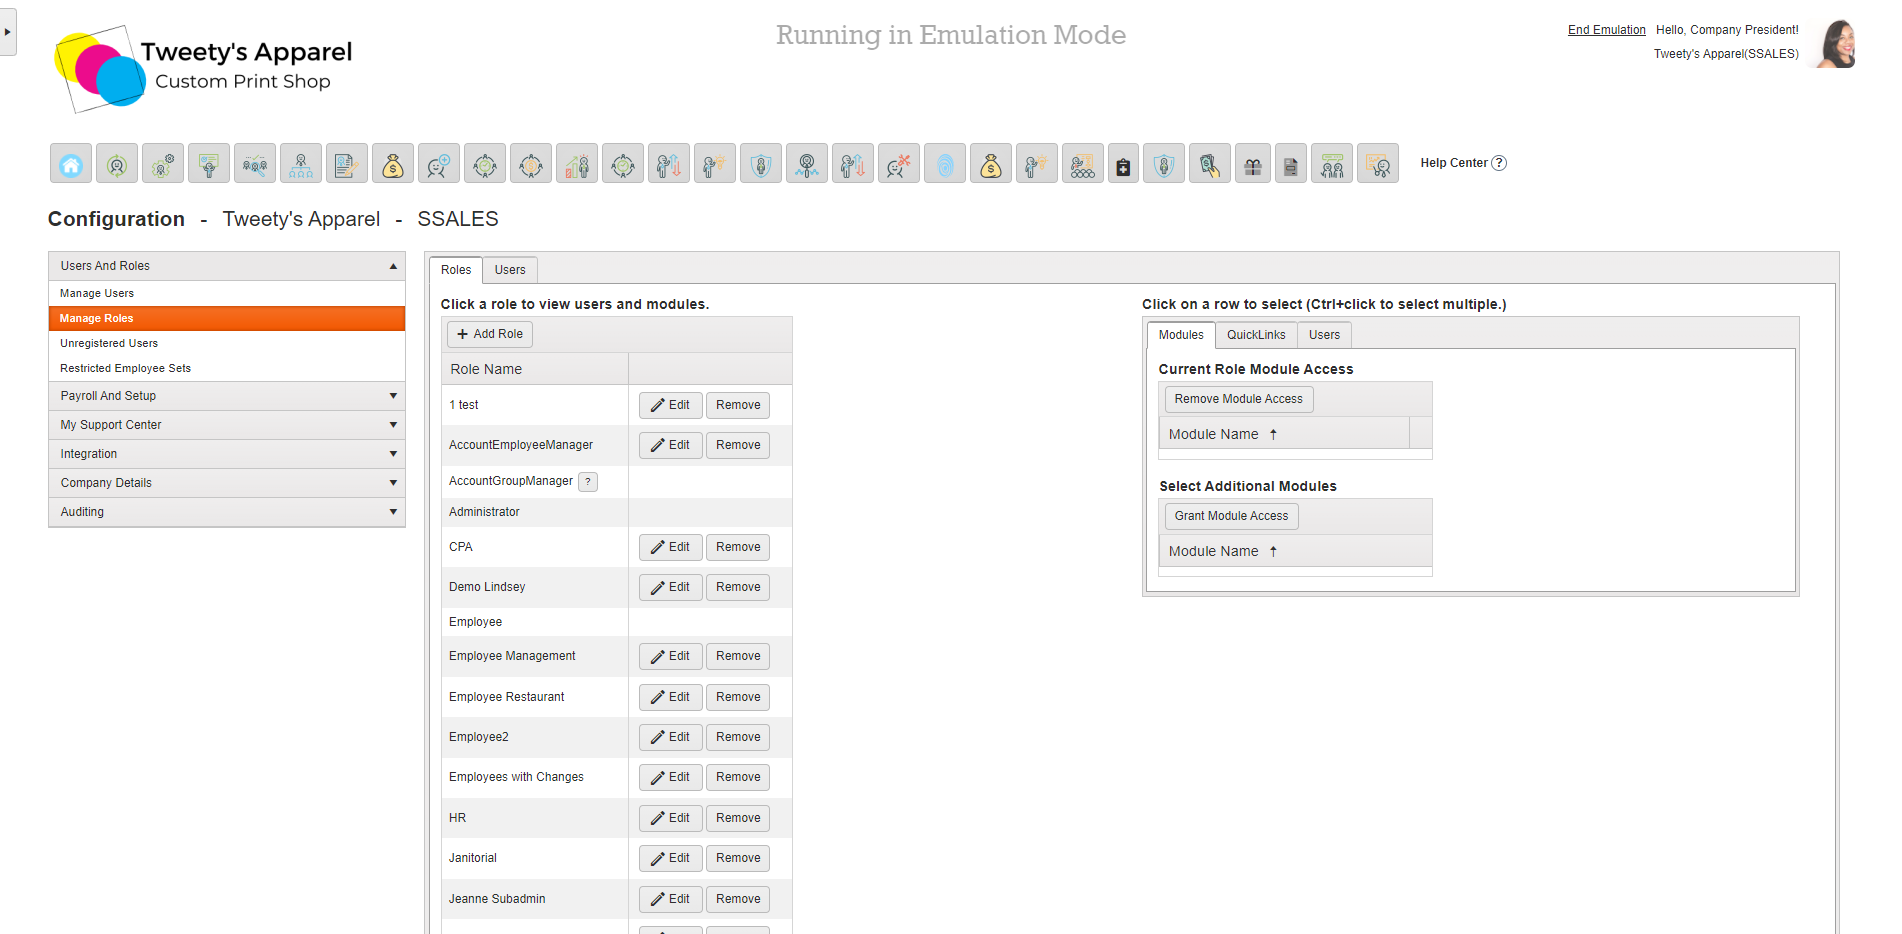
From the table on the left, click on the role you would like to edit to view or change its module access.
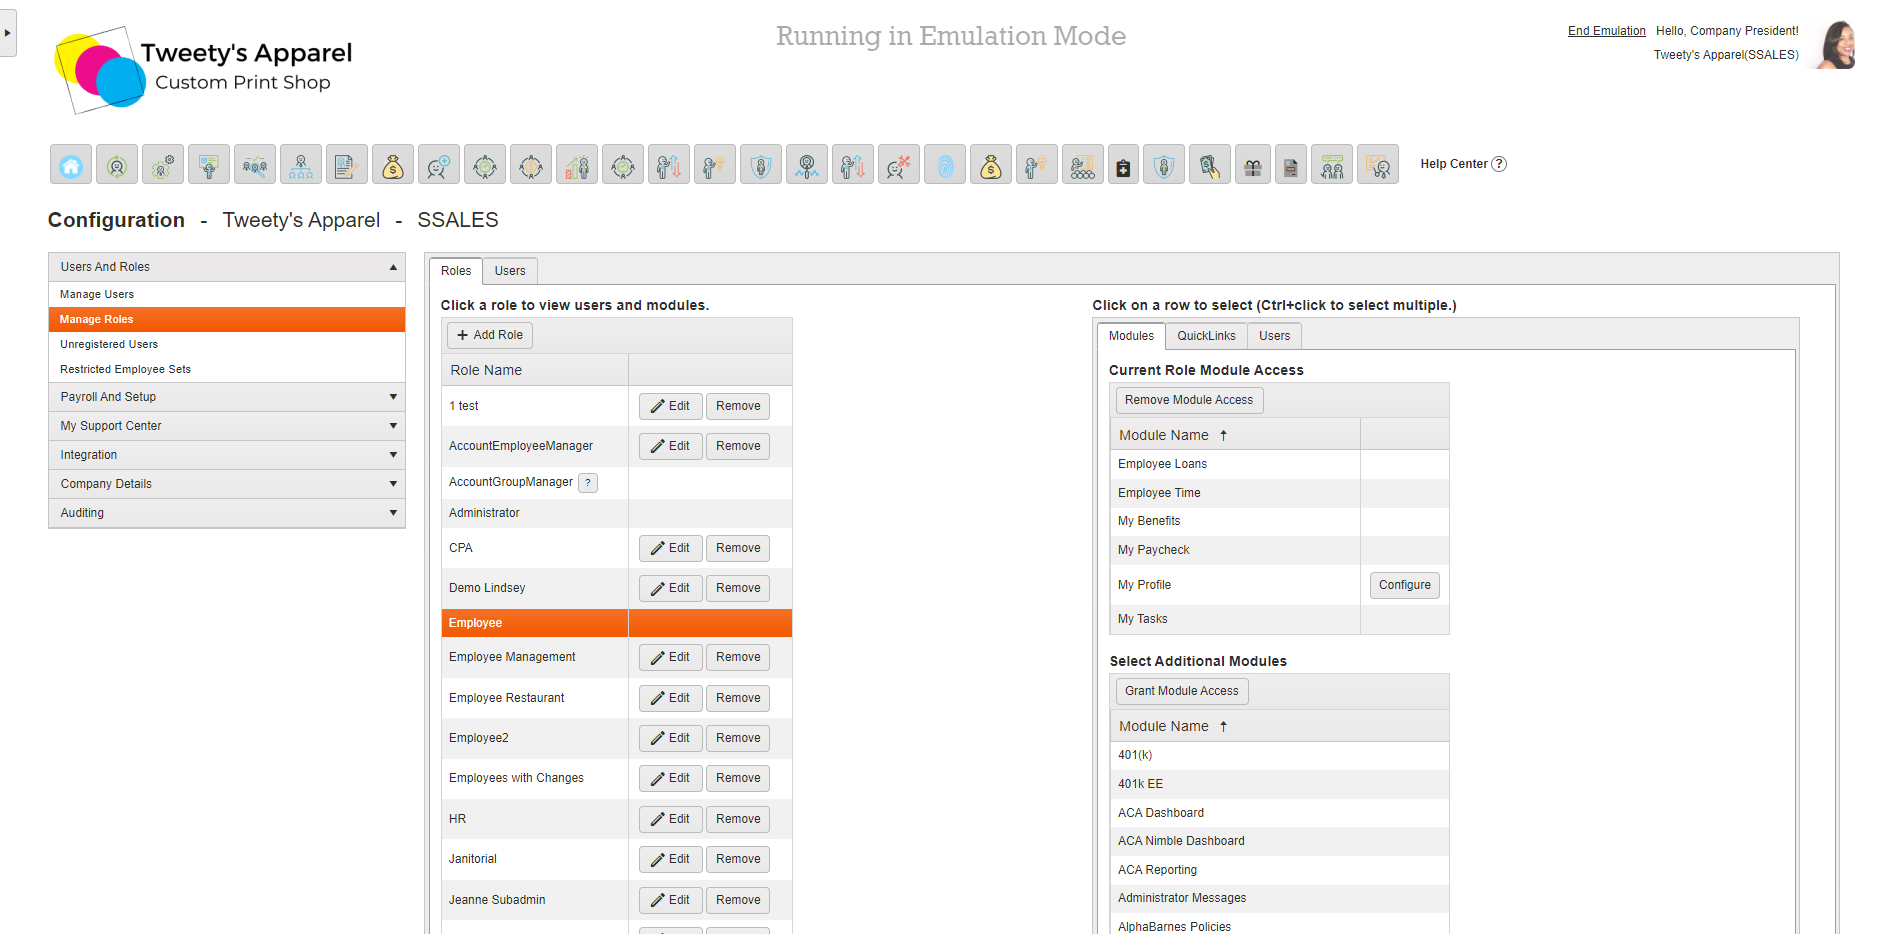
After you have selected a role from the left-side table, the right-side table will populate with the role's Current Role Module Access and all remaining modules to Select Additional Modules to be included in the role's access.
Some modules, such as My Profile, will have further configuration capabilities. In these instances, you can make sections or fields in the system visible/invisible, editable/read-only, or editable pending manager approval by selecting Configure.
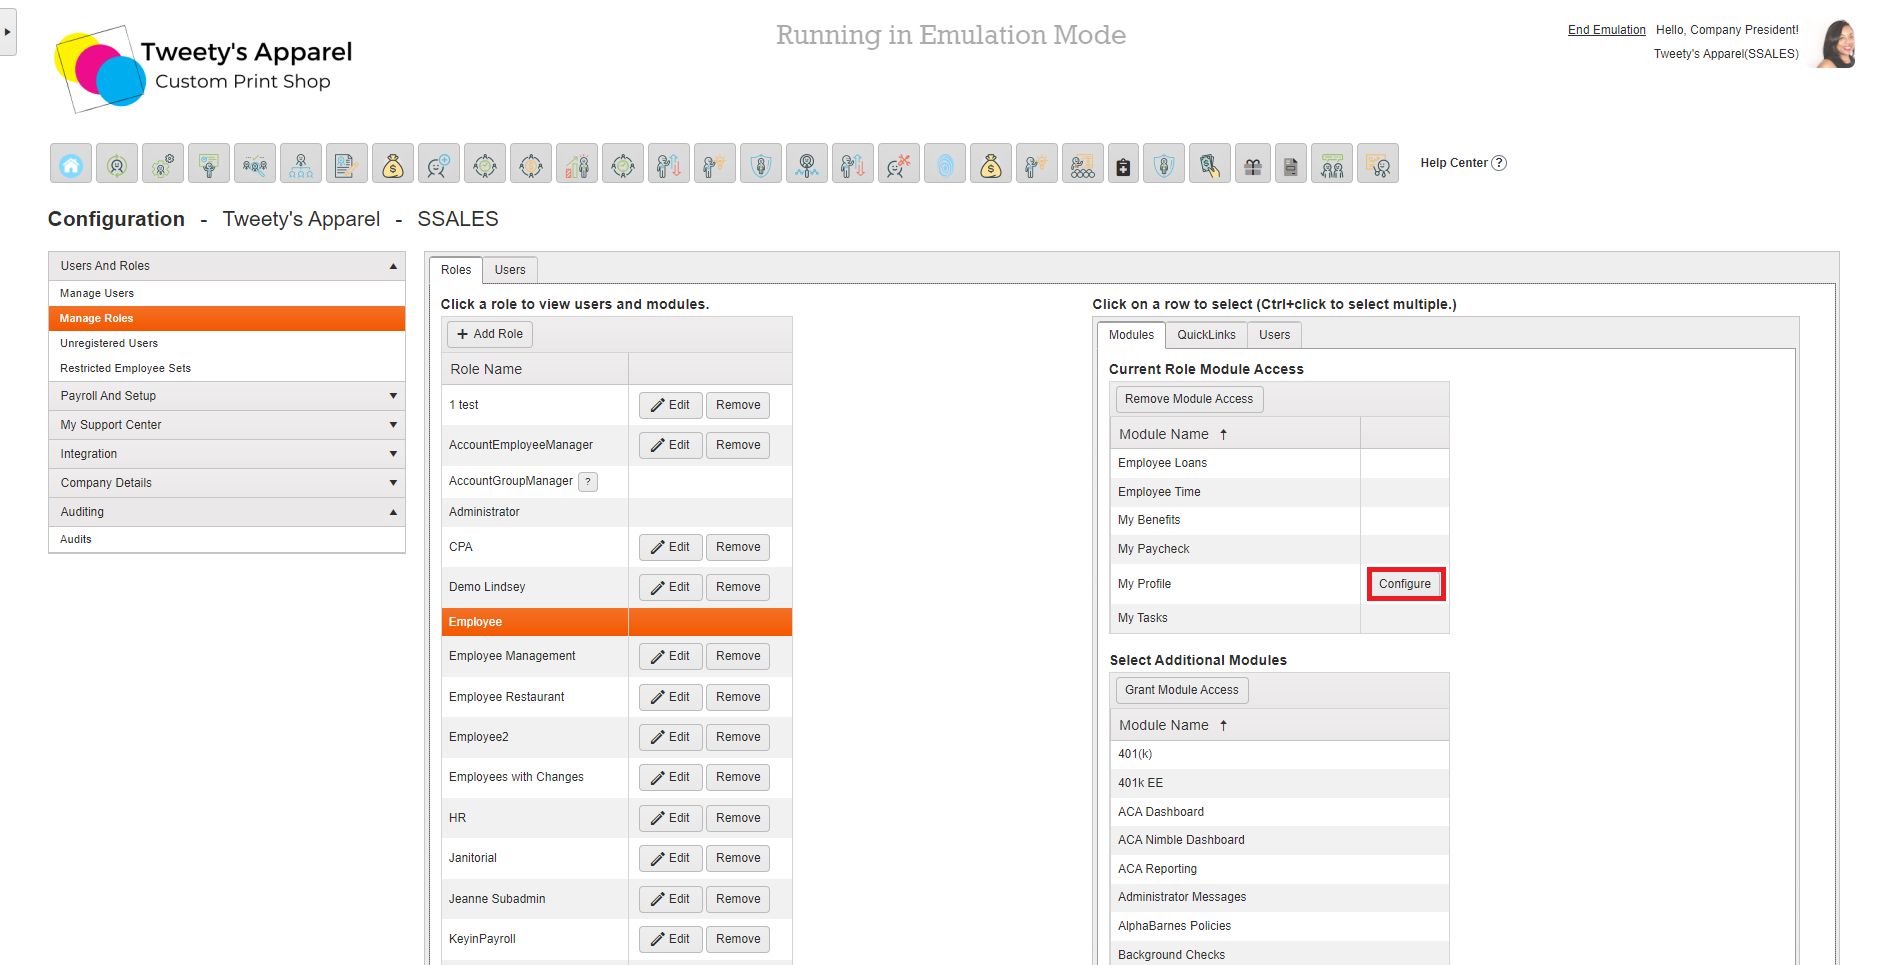
This will open a dialogue box to configure the module display access. From here, you can edit the section as a whole by clicking Edit, or select the drop-down arrows to view the section details and make your edits at a sub-section or field-level.
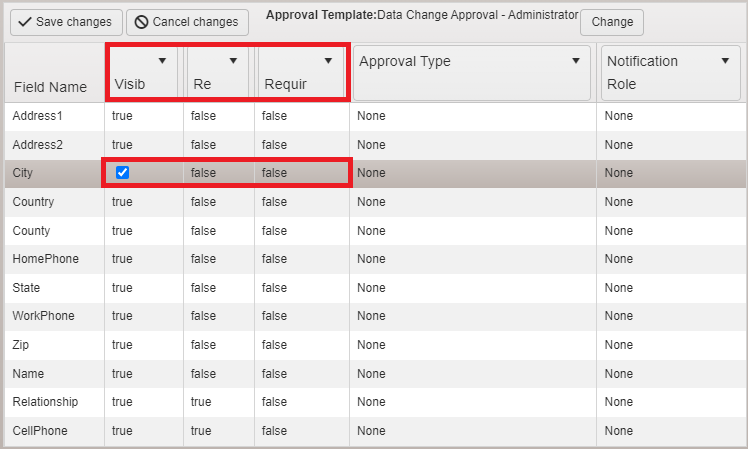
Once you have found the section/field(s) you would like to create your approval template for, ensure:
- Visibility is set to true - This way users will be able to see the section/field
- Read-Only is set to false - This will allow users to edit the field themselves
- Required - You can select if you would like this field to be required (true) or not (false) depending on your preferences
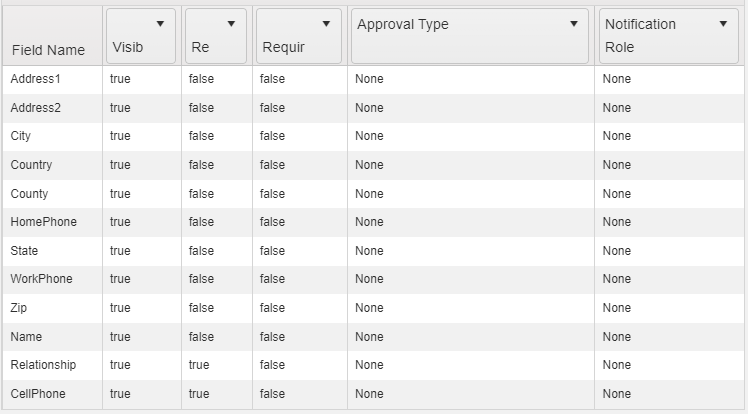
Top Tip: Selecting the Header drop-downs will update settings for the entire section, while clicking into an individual Field will only update that field's settings.
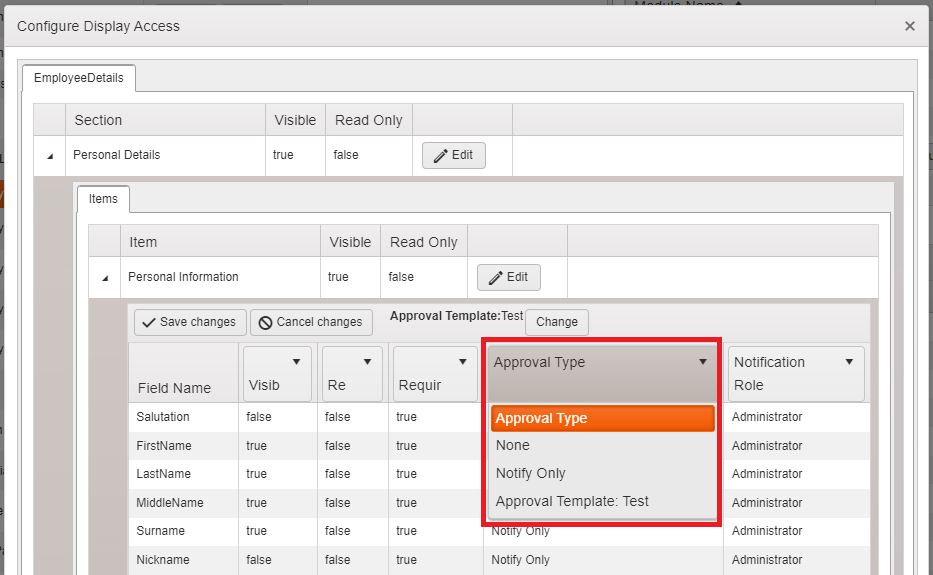
Once your Visibility, Read-Only, and Required fields are updated, you can select your Approval Type. Again, you can update this for the entire section using the Header drop-down, or click into any individual line item to update it for a single field.
Header drop-down:
Field drop-down:
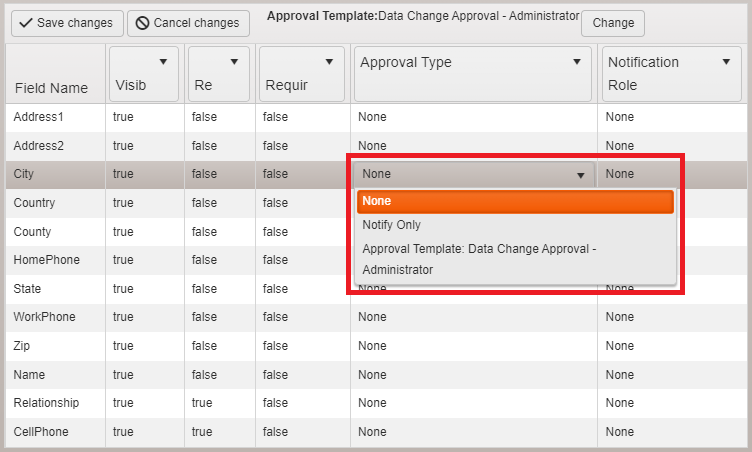
There are three Approval Type options:
- None - Will not require approval
- Notify Only - Will send an email notification to specified roles
- Approval Template - Will require approval using a selected template for changes are saved
Notify Only Approvals
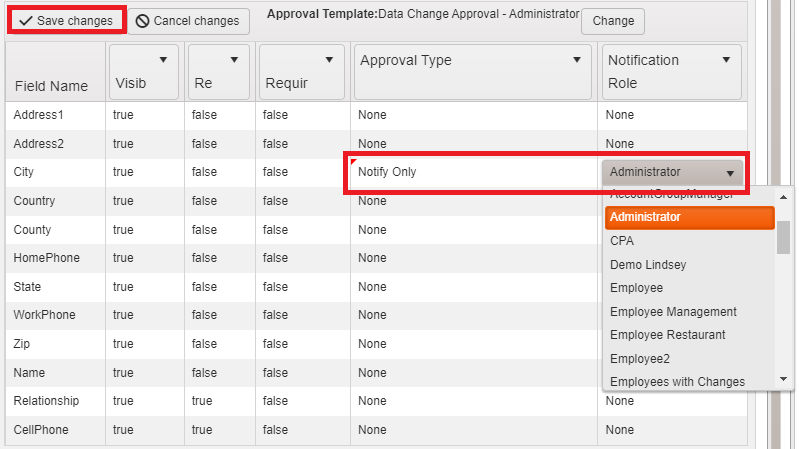
To set up a Notify Only approval, select Notify Only as the Approval Type. Then, select the role you would like to notify from the drop-down menu in the Notification Role column.
Top Tip: All users with the selected role will be notified of the change. If needed, you can create a new role specifically to receive these notifications.
Unsaved changes will have a red triangle in the top left corner. Click Save changes to save your changes before proceeding.
Approval Templates
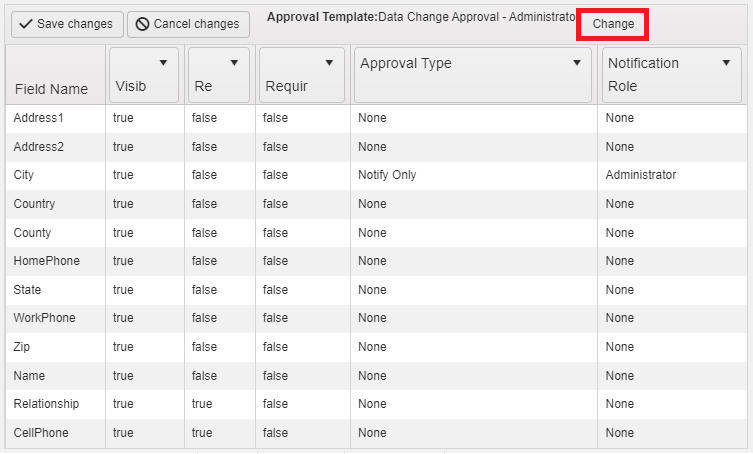
To require approval before the changes take effect, you will need to set up an Approval Template. To do so, click Change next to the currently selected Approval Template for the section you are in.
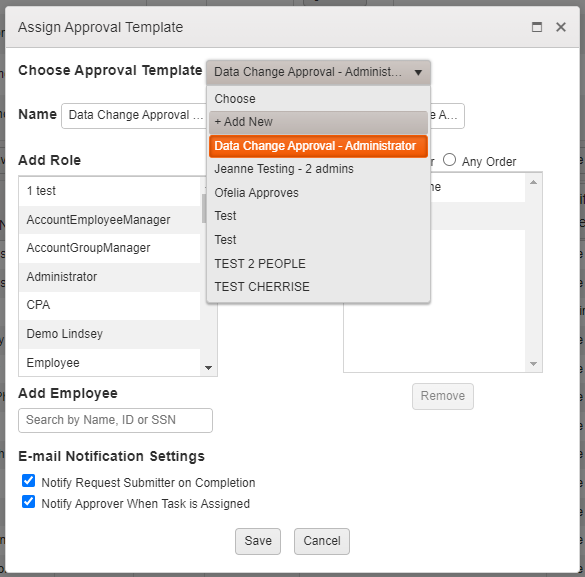
This will open a new Assign Approval Template dialogue box. If you have previously created an approval template you would like to use, you can select it from the drop-down menu. Otherwise, select +Add New from the drop-down menu.
Enter a Name and Description for your new Approval Template.
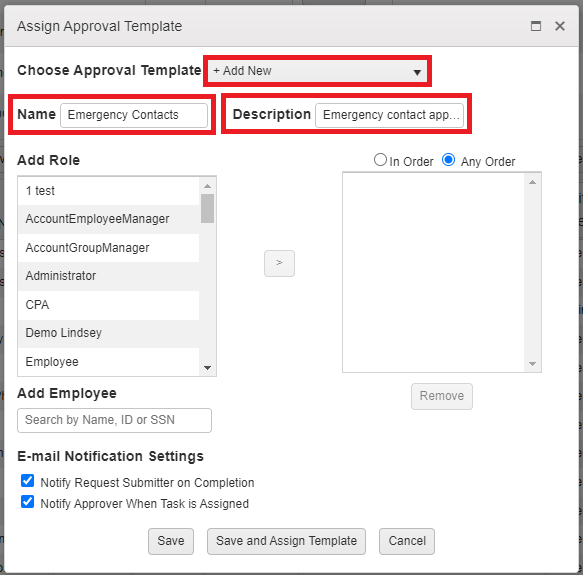
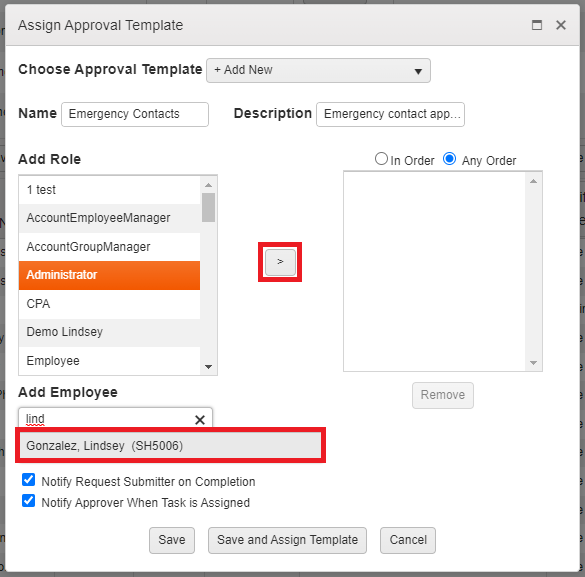
Then, select the role(s) and/or individual(s) you would like to approve changes by clicking the role followed by the arrow or typing the user's name, ID, or SSN and clicking on them.
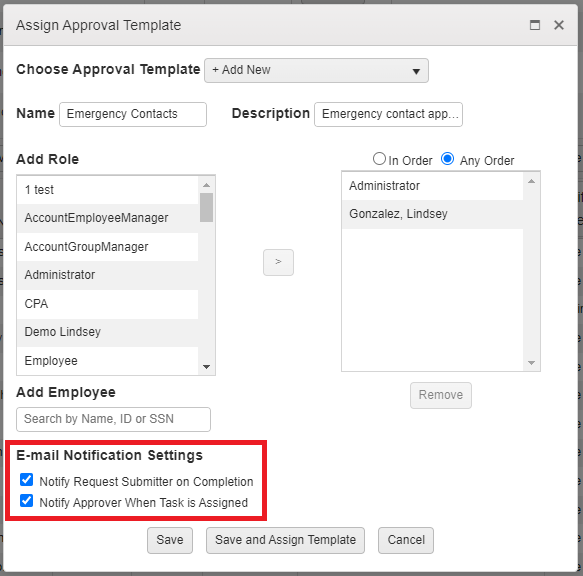
Next, confirm your Notification Settings:
- Notify Request Submitter on Completion - will send the employee an email confirmation once the change is approved
- Notify Approver When Task is Assigned - will send the approver an email that there is a change for them to approve when the employee makes the change
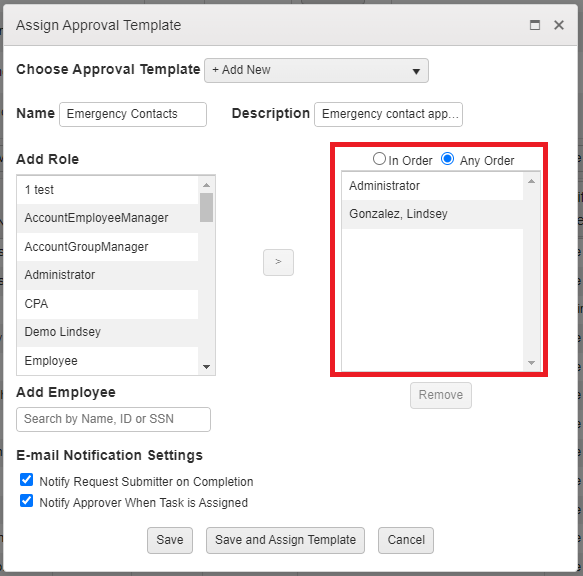
Then, if you have multiple approvers, you can select if you would like the approvals to occur In Order or in Any Order.
- In Order - will not notify the next approver until the prior approver has approved the change. If this is selected, you can drag and drop your approvers to change the order.
- Any Order - will notify all approvers at the same time. The changes will not take effect until all approvers have approved the change.
Top Tip: If you would like to remove an approving user or role from your Approval Template, you can do so by selecting the user or role and clicking Remove.
Once finished, click Save and Assign Template.
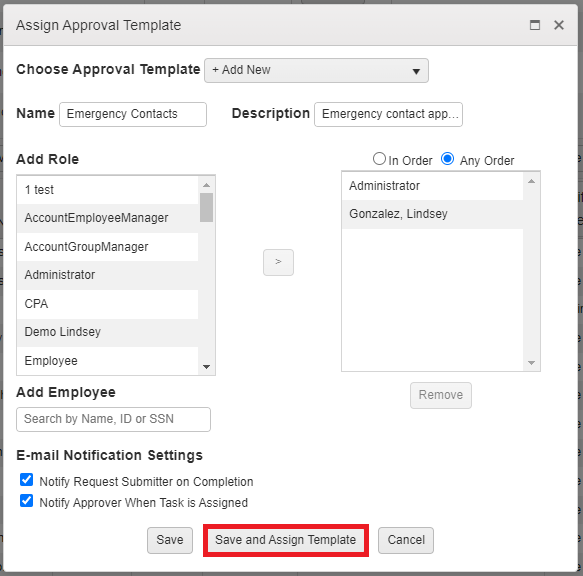
You will receive a confirmation that your change was saved successfully. Then, you will see that the Approval Template listed has been updated, and when you select the drop-down for a field or section, the Approval Template listed will also be the new template.
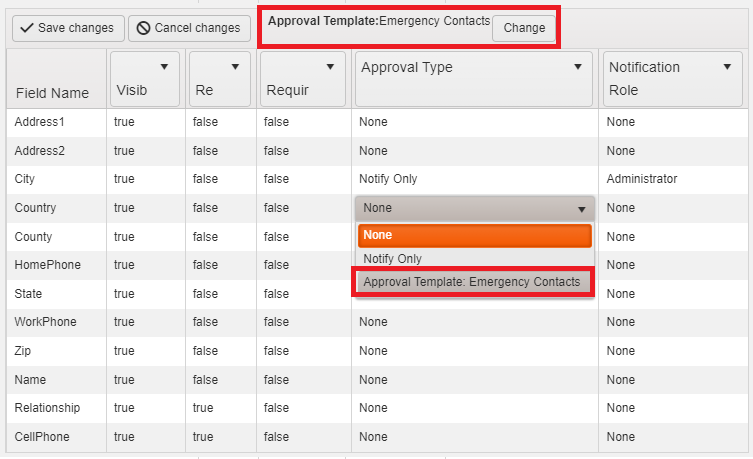
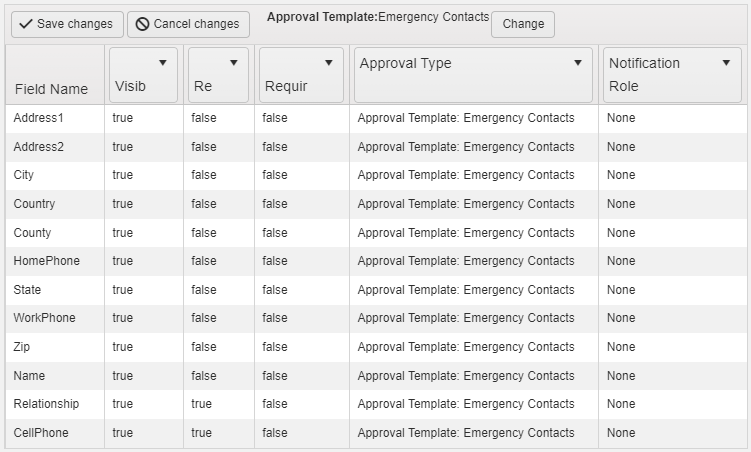
Click to add the Approval Template as the Approval Type for your preferred field(s)/section(s), then click Save Changes to save the change approval. These changes will take effect immediately.
Comments
0 comments
Please sign in to leave a comment.