
Processing payroll is one of the key functions in your HRIS portal. In this article, you'll find a basic overview of how to process payroll in your Administrator portal.
Tutorial Video
Legacy View
Step-By-Step Instructions
1. Verify the check date and pay periods
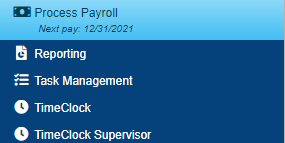
To begin, launch the Process Payroll module from your portal's home page.

This will open Step 1, Start Payroll. On this screen, you will want to:
- Verify that the Check Date is correct. If you need to change your check date, you can click Change to select a different check date from your payroll calendar.
- Confirm that your Pay Period (Period Begin & Period End) is correct.
- If you need to make any changes to your Pay Period or Batch Information (Batch, Description, Auto Pay settings), you can click on the Pencil icon to edit these.
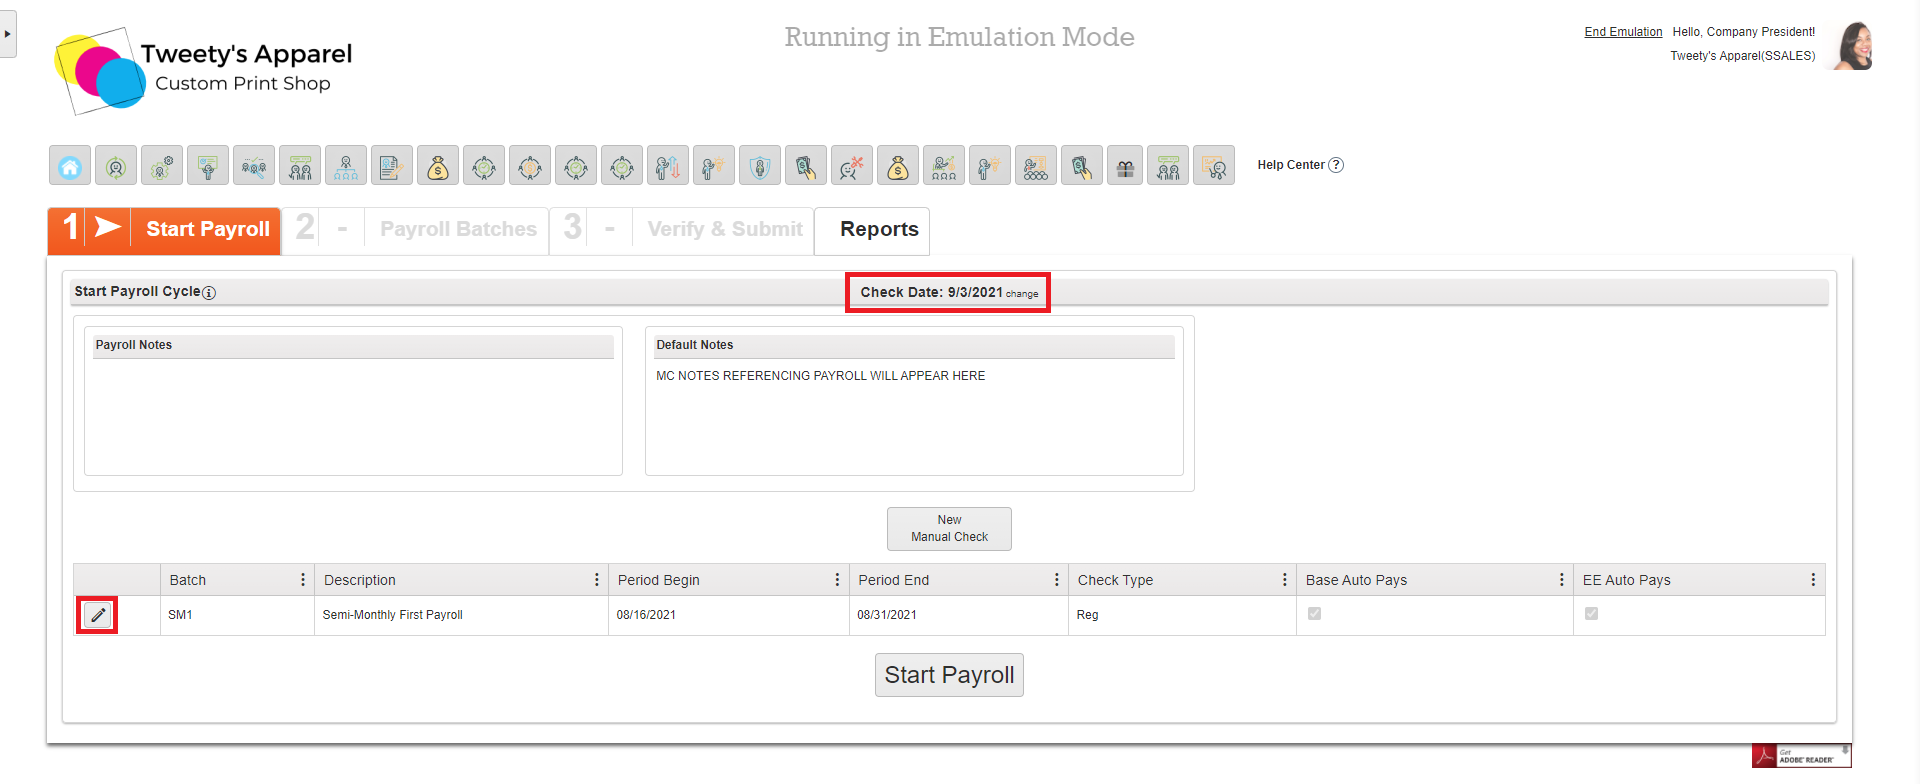
Once all information on this screen is correct, click Start Payroll.
Top Tip: If you would like to issue a Manual Check without starting payroll, you can also do this from the Start Payroll screen by selecting New Manual Check.
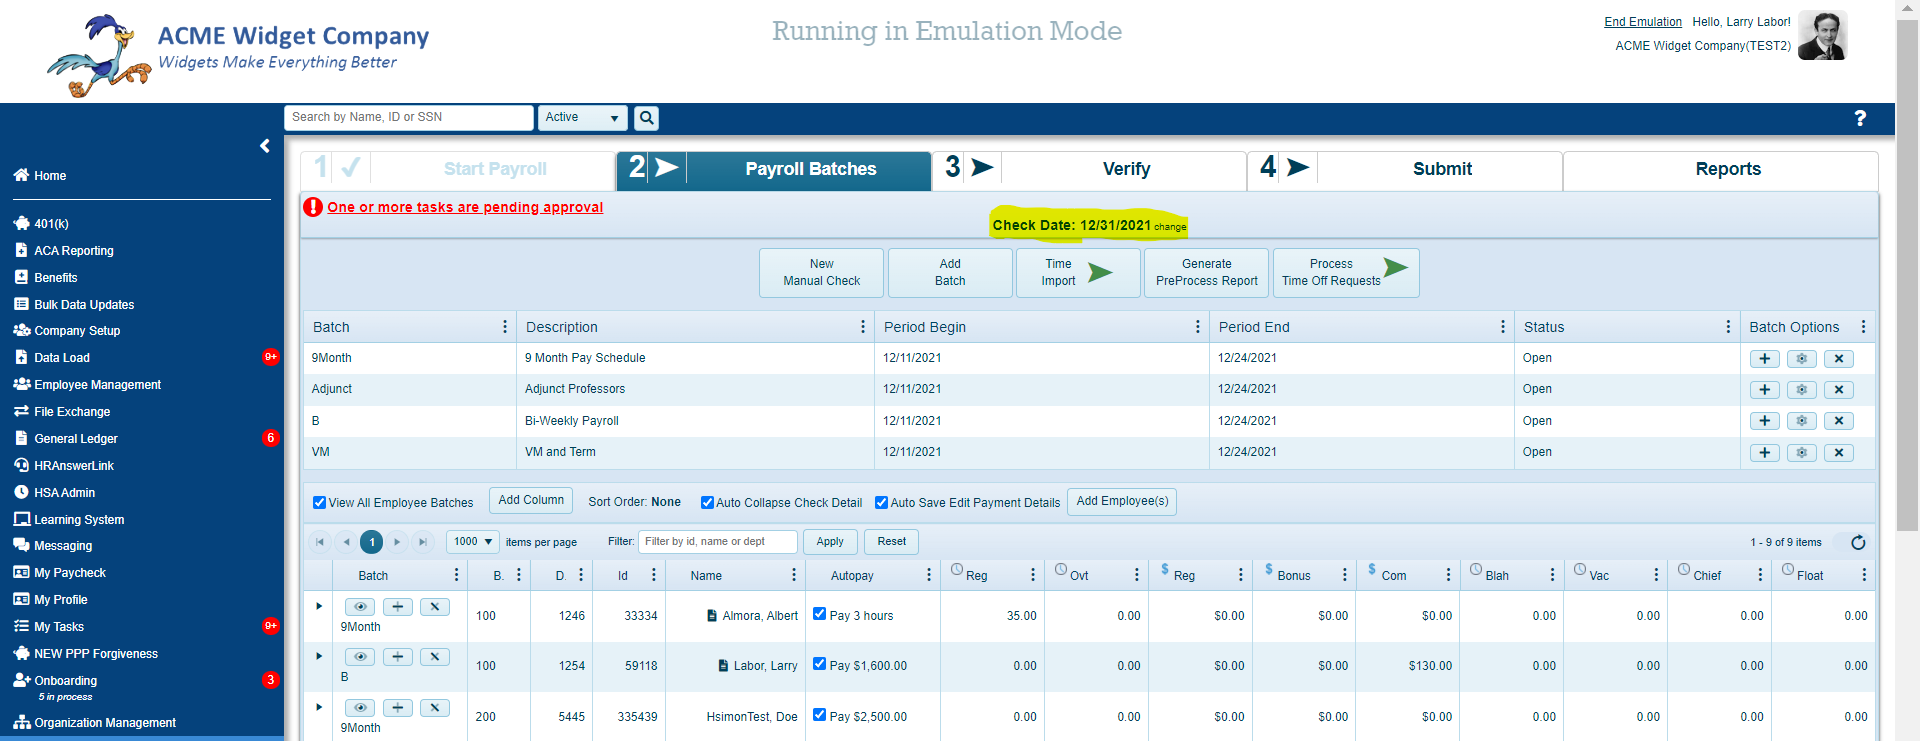
2. Set Up Your Batches & Pay Grid
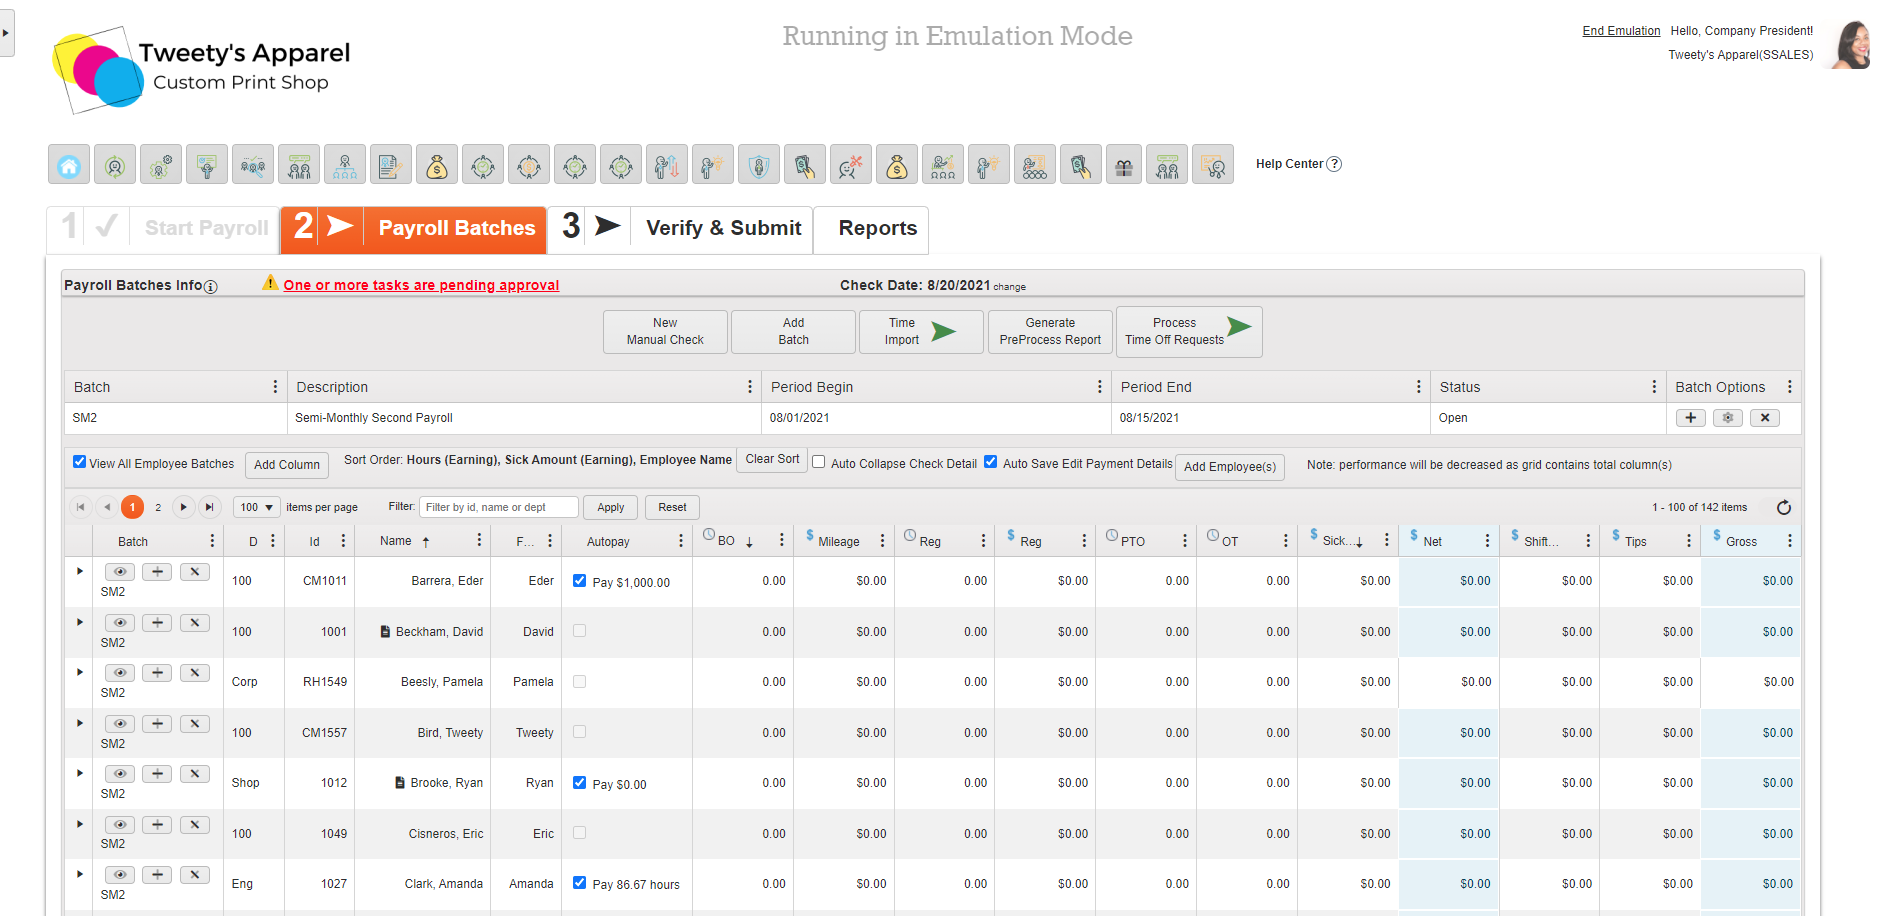
Once you start payroll, you will be taken to Step 2, Payroll Batches. Here, you can:
- View the list of employees currently in your batch
- Add or remove employees from your batch
- Create a new batch
- Delete or restart your batch
- Add or remove columns from your pay grid
- Sort and filter your pay grid as needed
Top Tip: You can find a more detailed article on setting up your batches and pay grid here!
3. Enter Payroll
Once your batches and payroll grid are properly set up, it's time to enter your payroll information. There are several methods to do this, depending on your business needs.
- Enter Directly On The Pay Grid
- Enter From Collapsible Menu
- Enter From Check Details Pop-Up
- Enter via Time Import
Top Tip: For more information on how to enter payroll using each of these methods and how to identify the best method for you, click here.
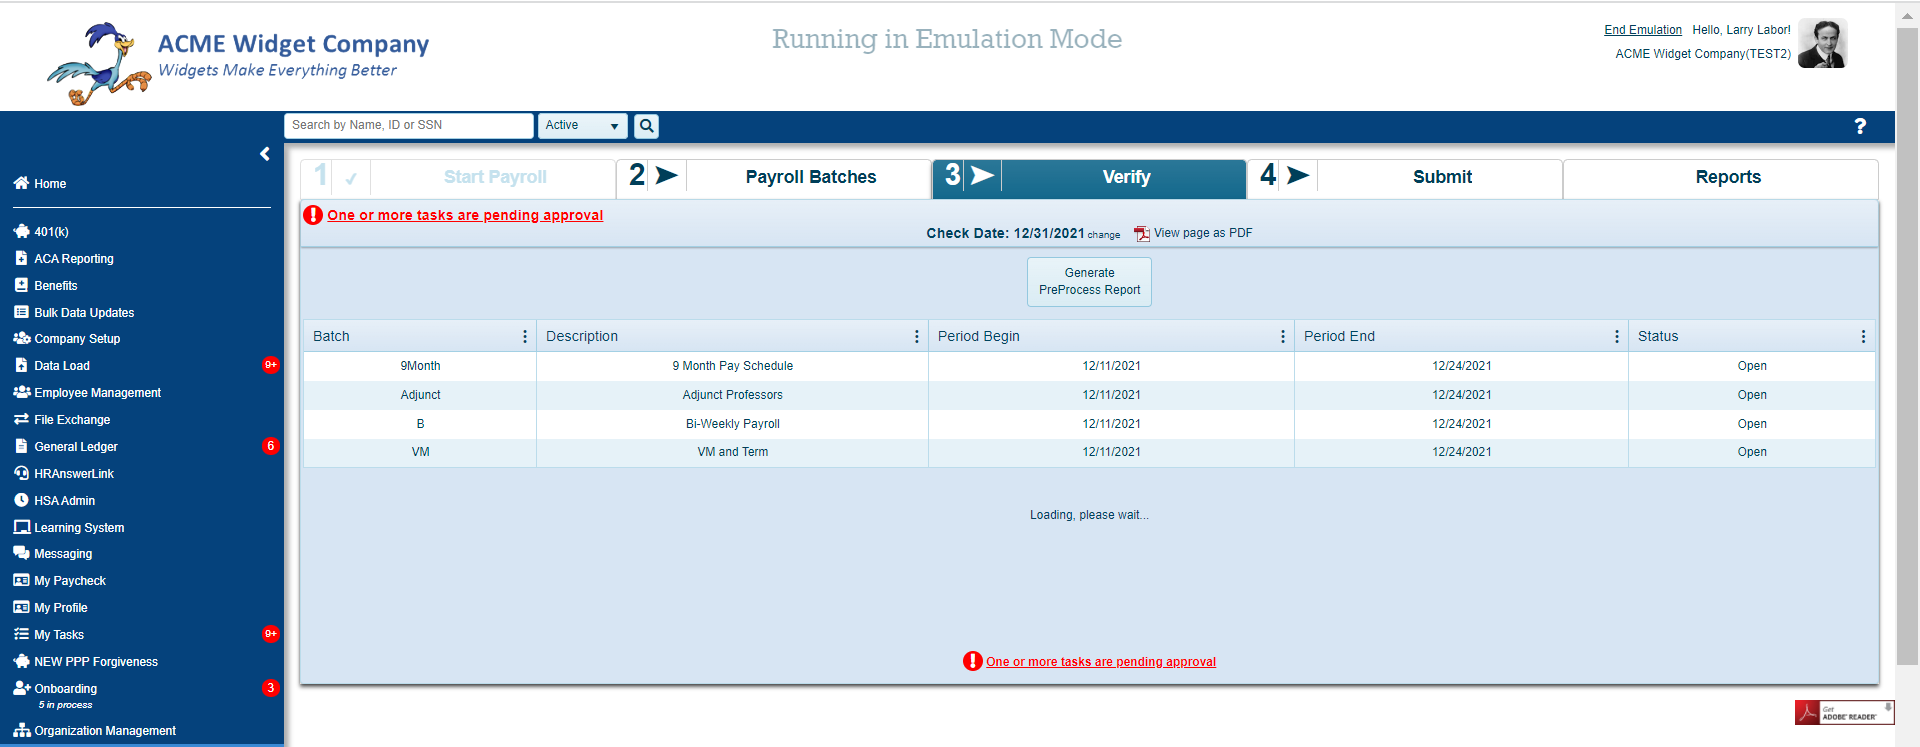
4. Verify & Submit
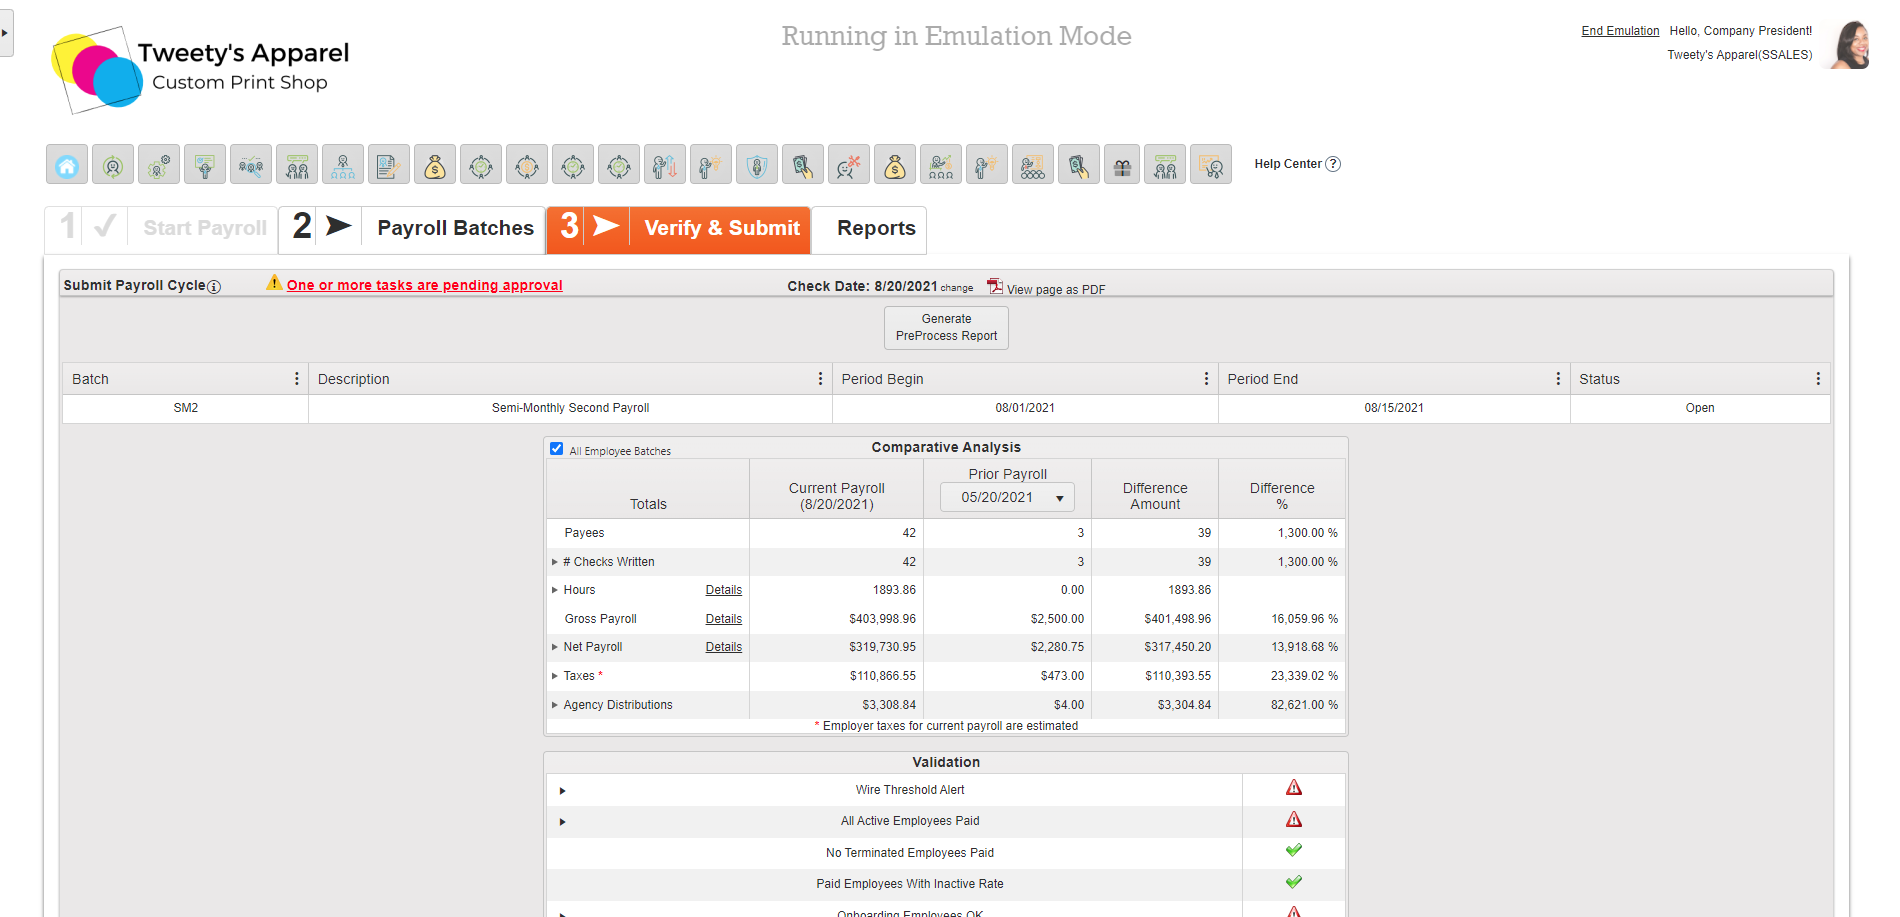
Once payroll has been entered, click Verify Payroll to move on to the next step.

Here, you can download and review your Pre-Process Report, and go through our system's Validation Checks to ensure your payroll information is complete and accurate prior to submitting.
Top Tip: For a more comprehensive walk-through of the system's Validation Checks and what to look for in each section, click here.
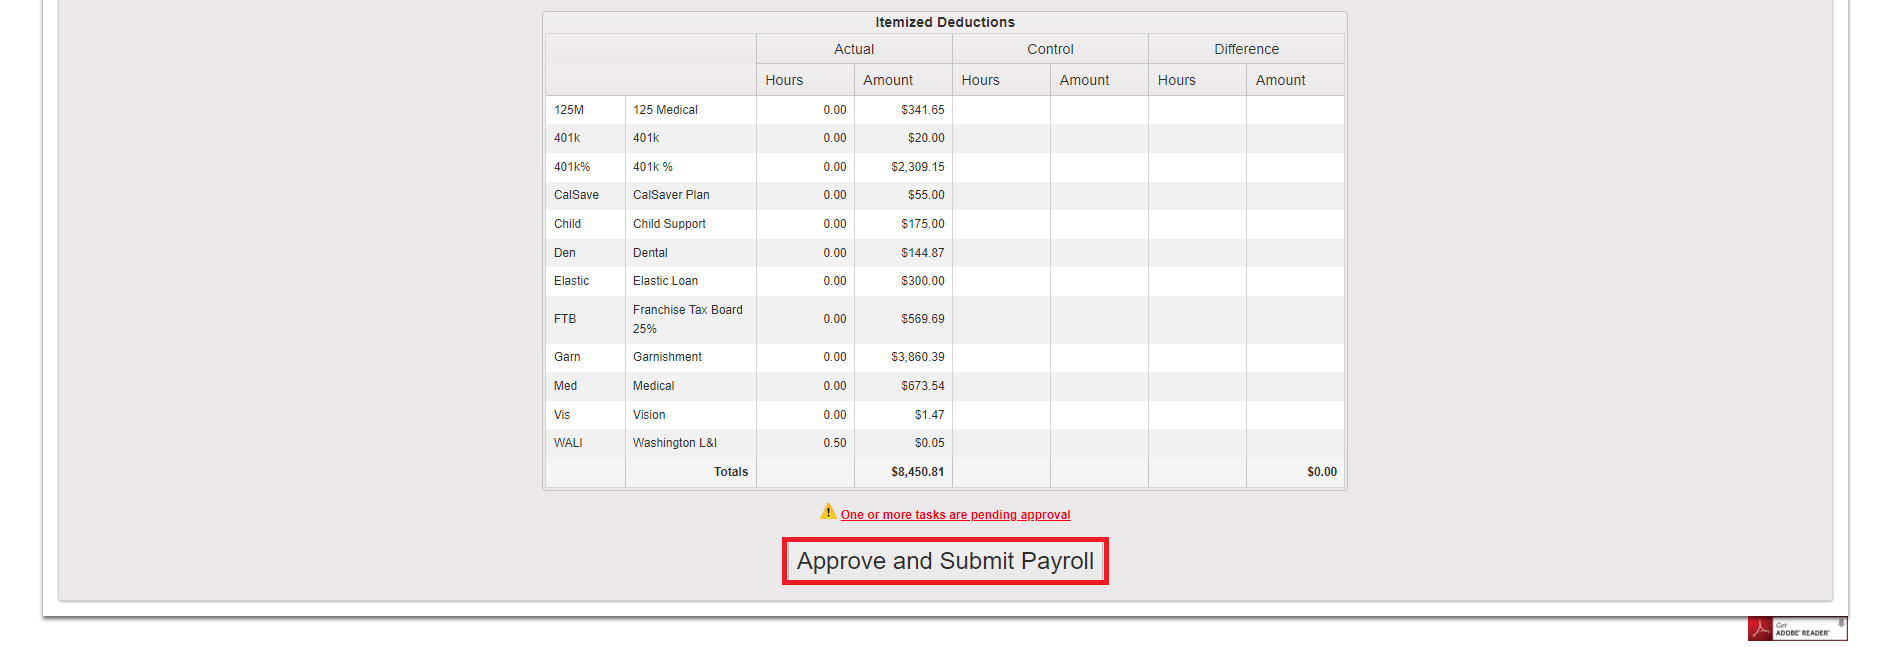
Then, after reviewing your Pre-Process Report and completing all Payroll Validation Checks, if the payroll is ready to process, click Approve and Submit Payroll to submit.
Important: This step is final and cannot be reversed. If any errors were made in the payroll batch(es) that have already been submitted, the client will incur fees associated with correcting the errors.
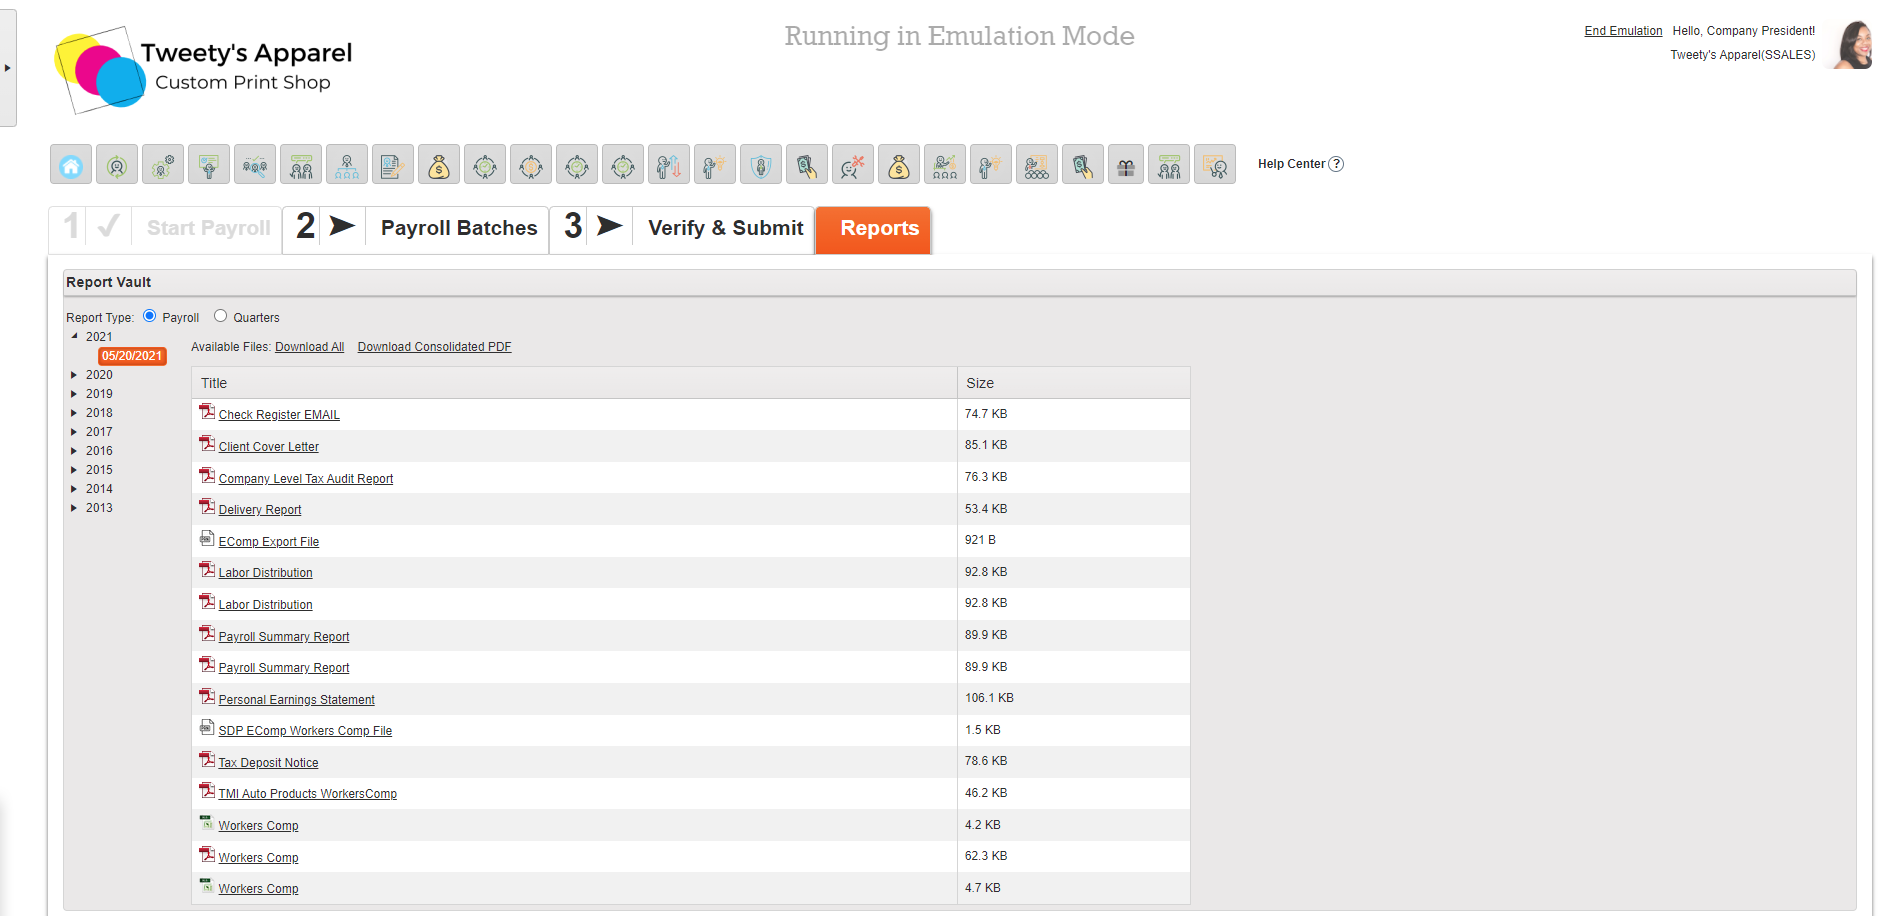
5. Reports
After payroll is submitted, your Payroll Report Package will be immediately available. You can either click on a single report to view and download it, select Download All (which will download each report separately), or select Download Consolidated PDF to download all reports as a combined, single PDF.
Redesigned View
Step-By-Step Instructions
1. Verify the check date and pay periods
To begin, launch the Process Payroll module from your portal's home page.
This will open Step 1, Start Payroll. On this screen, you will want to:
- Verify that the Check Date is correct. If you need to change your check date, you can click Change to select a different check date from your payroll calendar.
- Confirm that your Pay Period (Period Begin & Period End) is correct.
- If you need to make any changes to your Pay Period or Batch Information (Batch, Description, Auto Pay settings), you can click on the Pencil icon to edit these.
Once all information on this screen is correct, click Start Payroll.
Top Tip: If you would like to issue a Manual Check without starting payroll, you can also do this from the Start Payroll screen by selecting New Manual Check.
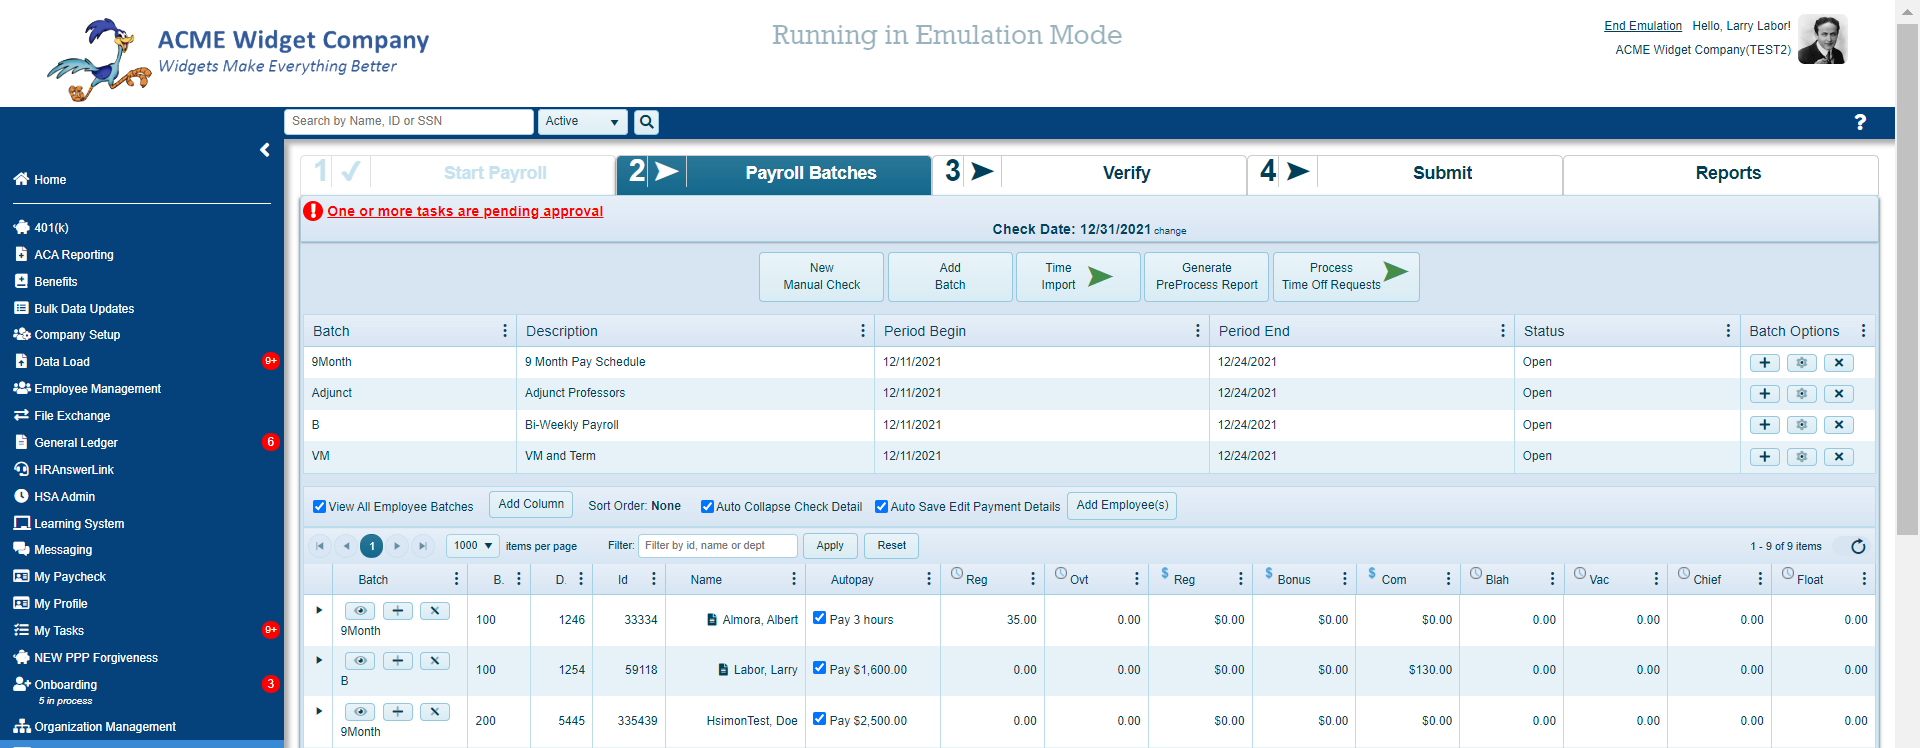
2. Set Up Your Batches & Pay Grid
Once you start payroll, you will be taken to Step 2, Payroll Batches. Here, you can:
- View the list of employees currently in your batch
- Add or remove employees from your batch
- Create a new batch
- Delete or restart your batch
- Add or remove columns from your pay grid
- Sort and filter your pay grid as needed
Top Tip: You can find a more detailed article on setting up your batches and pay grid here!
3. Enter Payroll
Once your batches and payroll grid are properly set up, it's time to enter your payroll information. There are several methods to do this, depending on your business needs.
- Enter Directly On The Pay Grid
- Enter From Collapsible Menu
- Enter From Check Details Pop-Up
- Enter via Time Import
Top Tip: For more information on how to enter payroll using each of these methods and how to identify the best method for you, click here.
4. Verify & Submit
Once payroll has been entered, click Verify Payroll to move on to the next step.
Here, you can download and review your Pre-Process Report, and go through our system's Validation Checks to ensure your payroll information is complete and accurate prior to submitting.
Top Tip: For a more comprehensive walk-through of the system's Validation Checks and what to look for in each section, click here.
Then, after reviewing your Pre-Process Report and completing all Payroll Validation Checks, if the payroll is ready to process, click Approve and Submit Payroll to submit.
Important: This step is final and cannot be reversed. If any errors were made in the payroll batch(es) that have already been submitted, the client will incur fees associated with correcting the errors.
5. Reports
After payroll is submitted, your Payroll Report Package will be immediately available. You can either click on a single report to view and download it, select Download All (which will download each report separately), or select Download Consolidated PDF to download all reports as a combined, single PDF.
Comments
0 comments
Please sign in to leave a comment.